PfSense - OpenVPN
Overview and Objective
This document outlines the process for setting up a site-to-site OpenVPN connection using pfSense. The goal is to establish a secure, encrypted tunnel between two separate networks over the internet, ensuring secure communication and data transfer between the connected networks.
The objective of this guide is to provide step-by-step instructions for configuring this site-to-site OpenVPN connection using SSL/TLS on pfSense. This setup aims to create a secure link between two remote networks, allowing for seamless and secure communication as if they were on the same local network.
Network Diagram
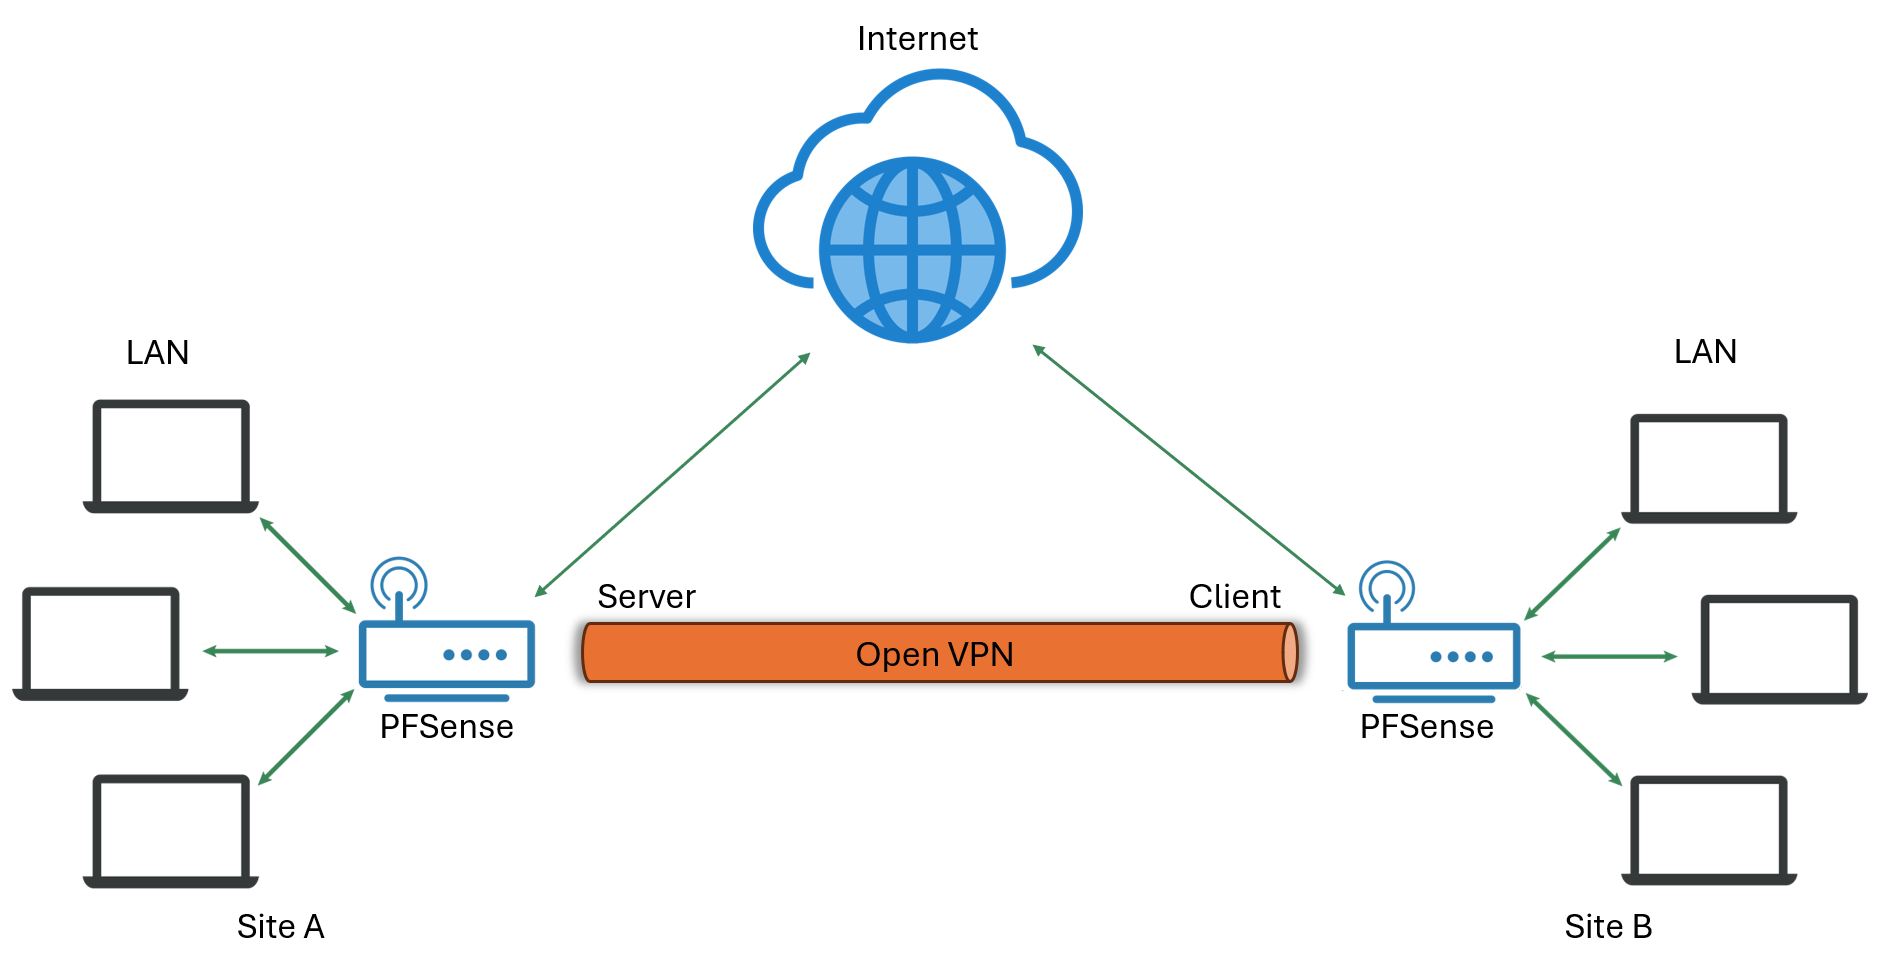
- Site A: This site has a local area network (LAN) connected to a pfSense router. The pfSense router at Site A is configured as the OpenVPN server.
- Site B: This site also has a local area network (LAN) connected to a pfSense router. The pfSense router at Site B is configured as the OpenVPN client.
The end result is that Site A and Site B will be securely connected as if they are on the same local network, allowing seamless communication between the two sites.
Why PFsense
pfSense offers a user-friendly interface with an integrated OpenVPN, simplifying the setup process significantly. Its comprehensive documentation and strong community support further streamline implementation, making it a highly accessible and cost-effective solution for secure site-to-site VPN connections.
Table of Contents
Certificates
Create a Certificate Authority (CA)
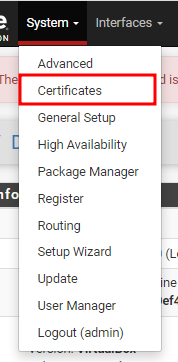
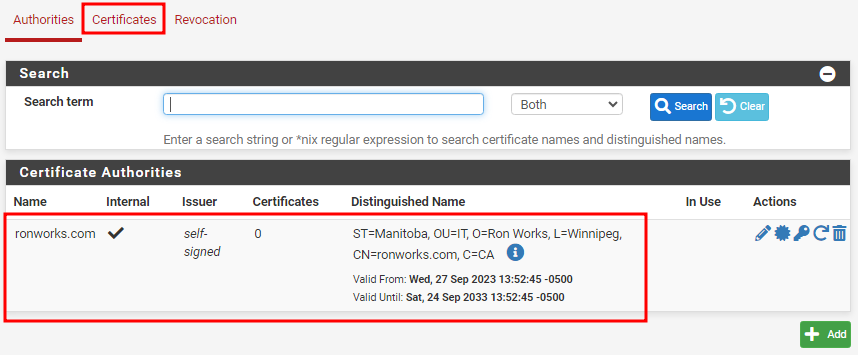
- From the top menu click System > Certificates
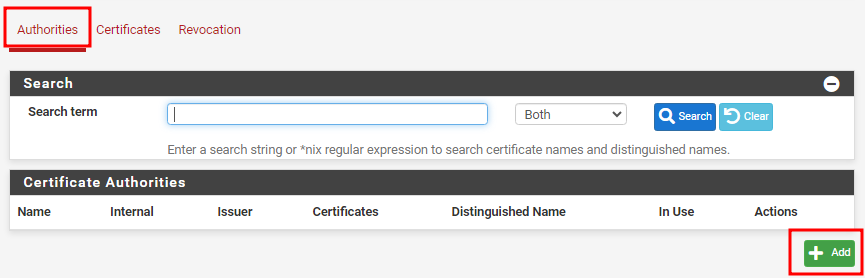
- Make sure you are at Authorities tab then click Add
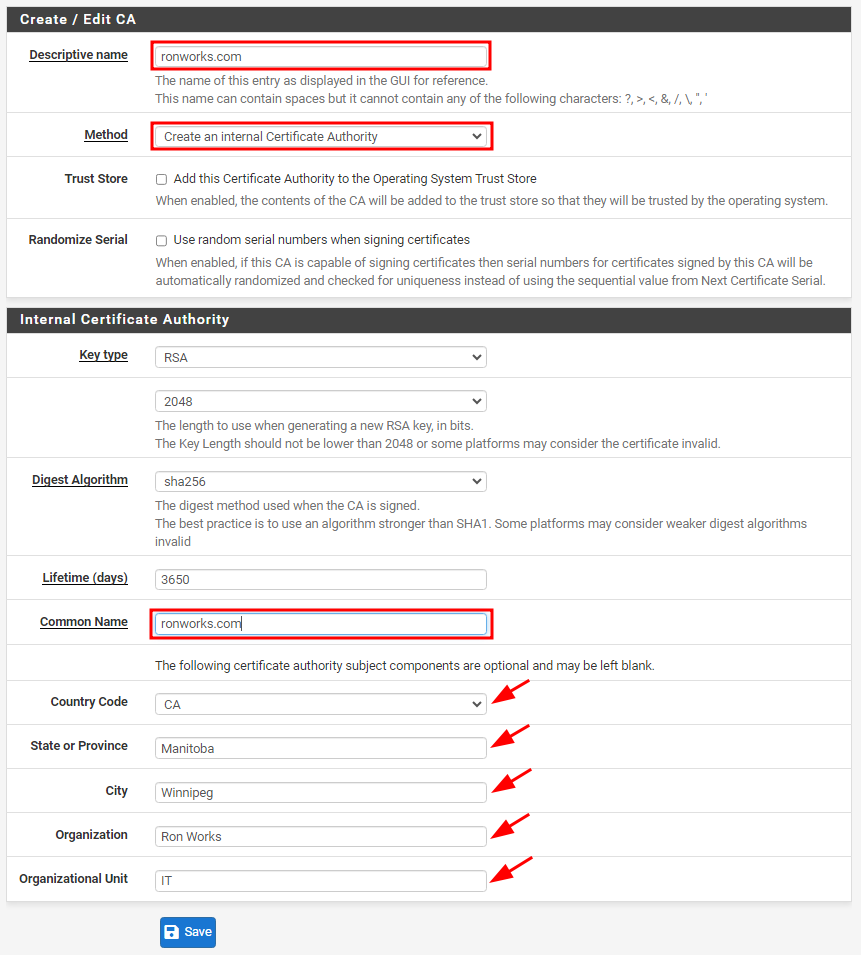
- Fill up the requirted information:
-
Descriptive name : ronworks.com you can put anything as description
-
Under Internal Certificate AUthority, the default will work but it is ideal to put in your information to avoid confusion id having multiple CAs.
-
then click Save.
-
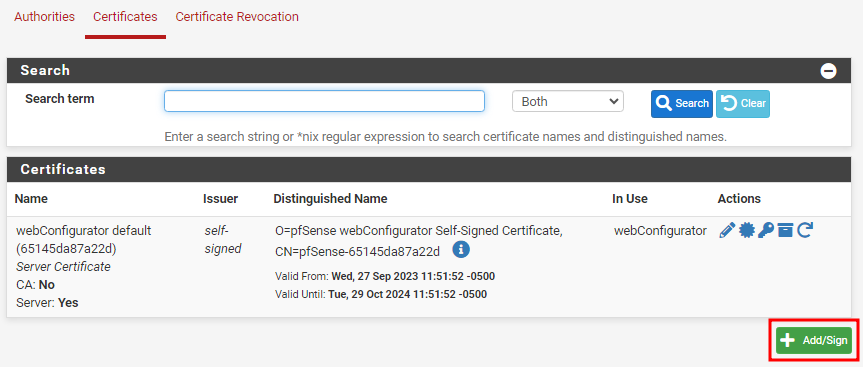
- Verify that the CA is created then click Certificates tab.
Creating Server and User Certificates
Creating Server Certificates
- From the Certificates tab, click Add/Sign.
- At the Add/Sign a New Certificate section, make sure that:
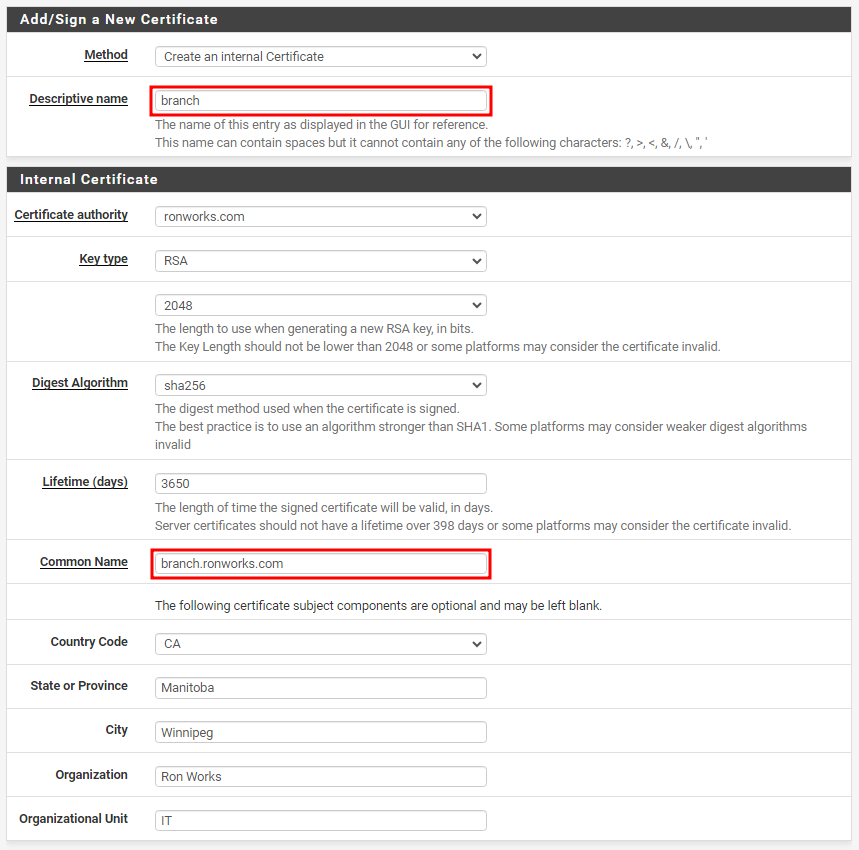
- Method : Create Internal Certificate
- Descriptive name can be anything helpful for you to describe its purpose.

- At the Internal Certificate section, make sure that:
- Certificate Authority us same as the Certificate Authority (CA) created earlier.
- For Common Name the combination of the descriptive name and the CA can be used.

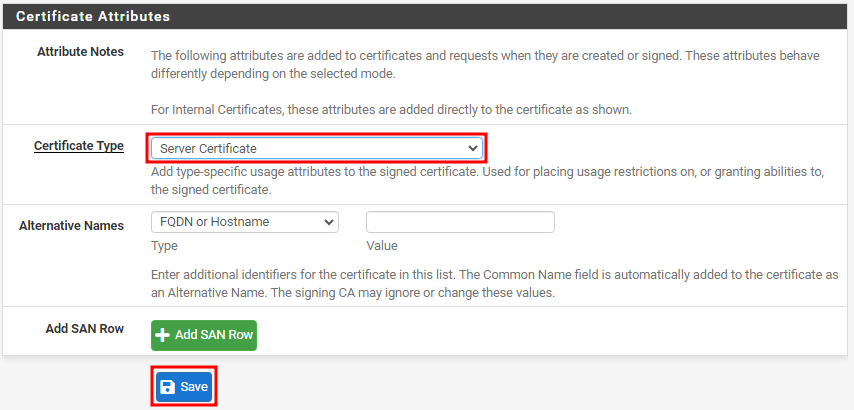
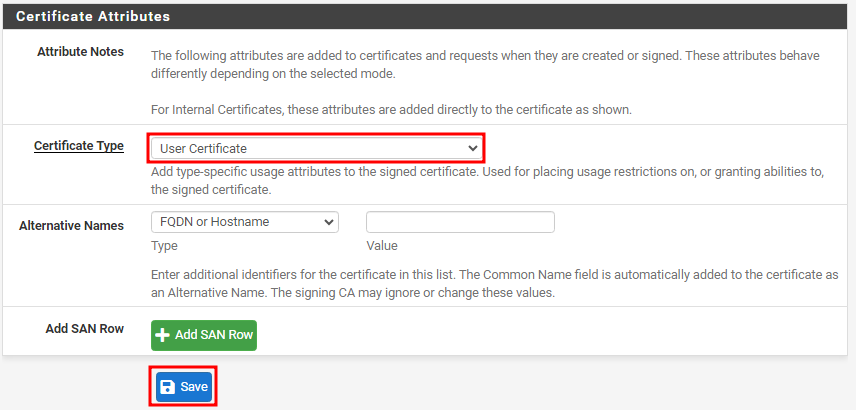
- At the Certificate Attributes section, make sure that the Certificate type is Server Certificate. Then click Save.
Creating User Certificates
- Follow steps in creating server certificates. Take note of the following changes.
- At the Certificate Attributes section, choose User Certificate in Certificate type then click Save.
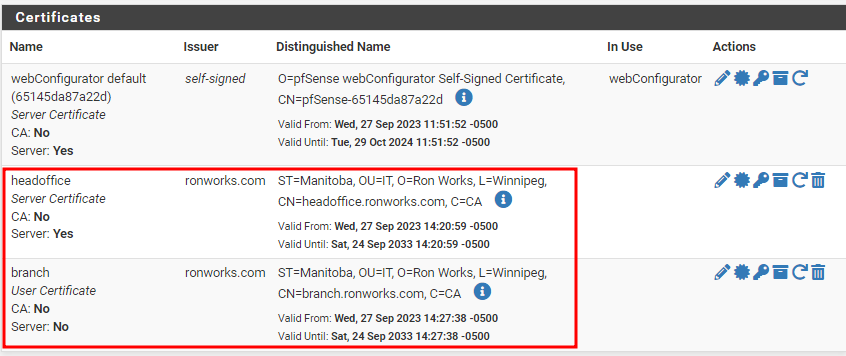
- Verify that the certificates are created according to the specification inputed.
Import certificates from OpenVPN Server to the Client Server.
- On both server and client open pfsense.
- Go to System > Certificates then click authorities.
- On the server side click edit on the Certificate authority (CA) to be imported and Add on the client.
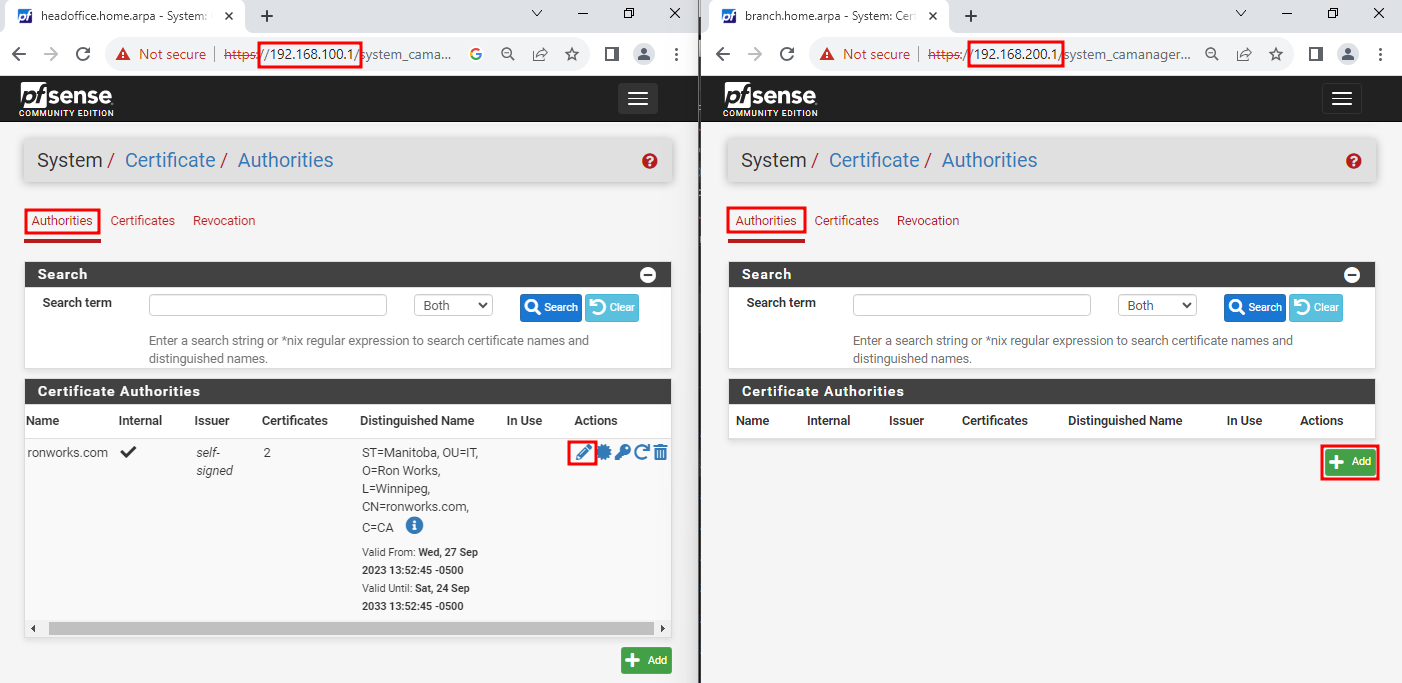
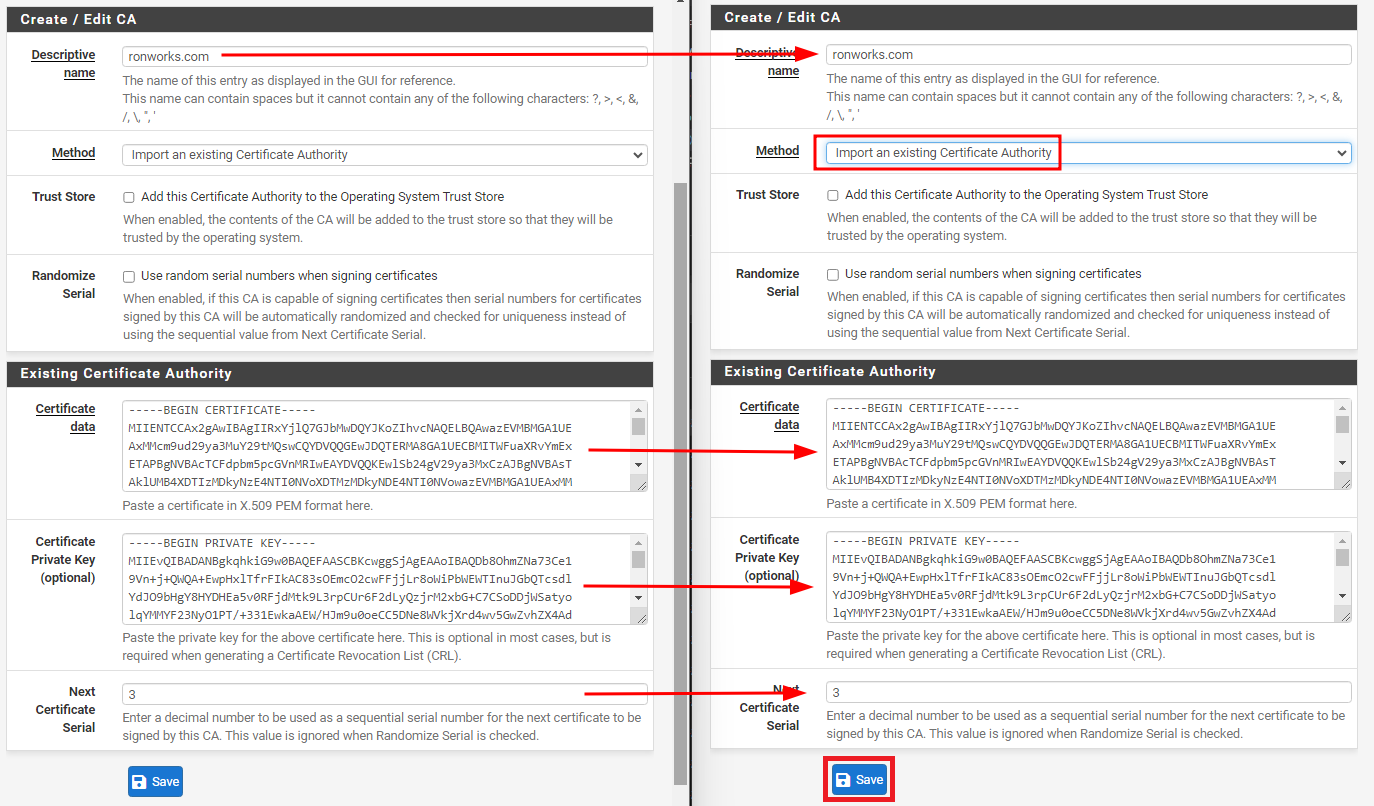
- On the client’s Method choose Import an existing Certificate Authority fromt he dropdown. Then copy all field values from the server to the client. Then click Save.
- Then on both server click, click Certificates tab.
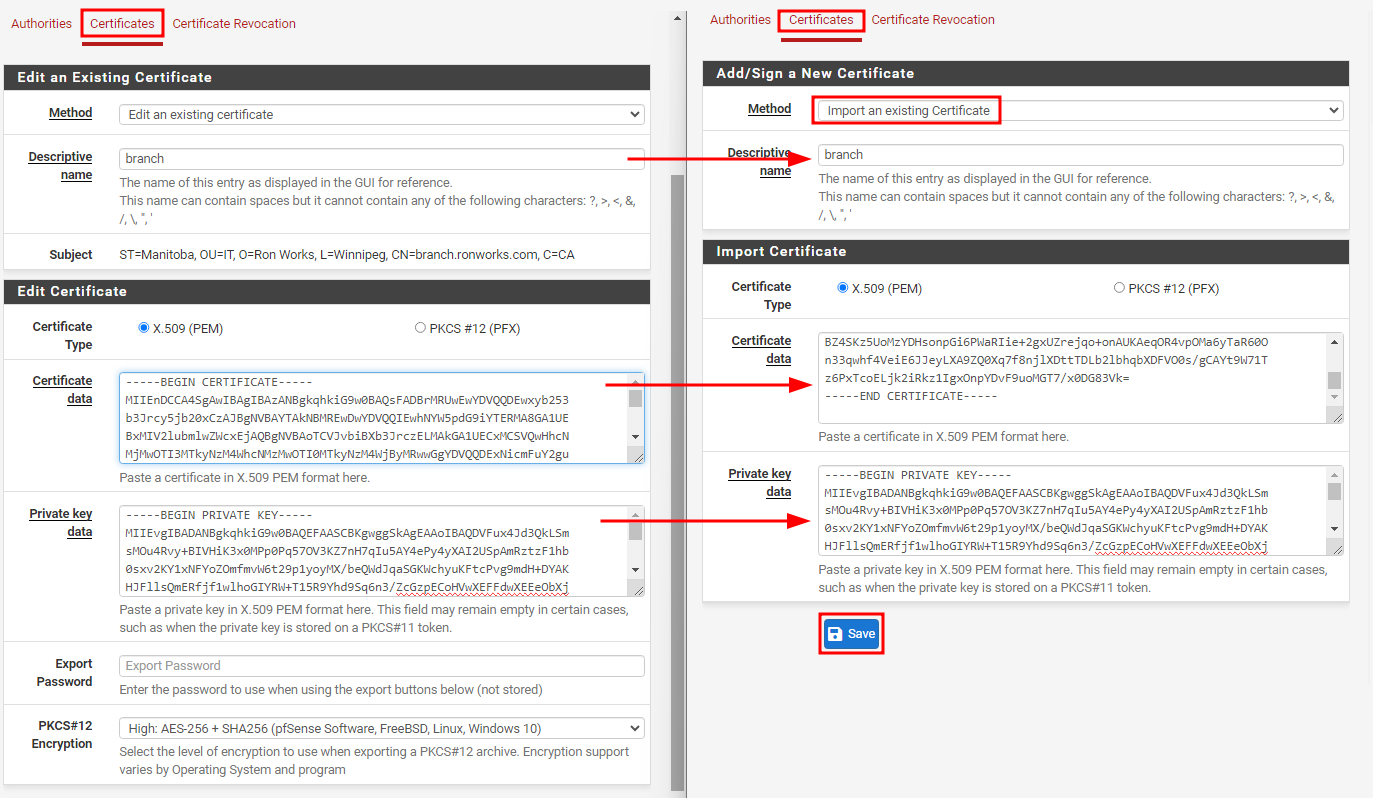
On the server click edit for the User Certificate then Add/Sign on the client.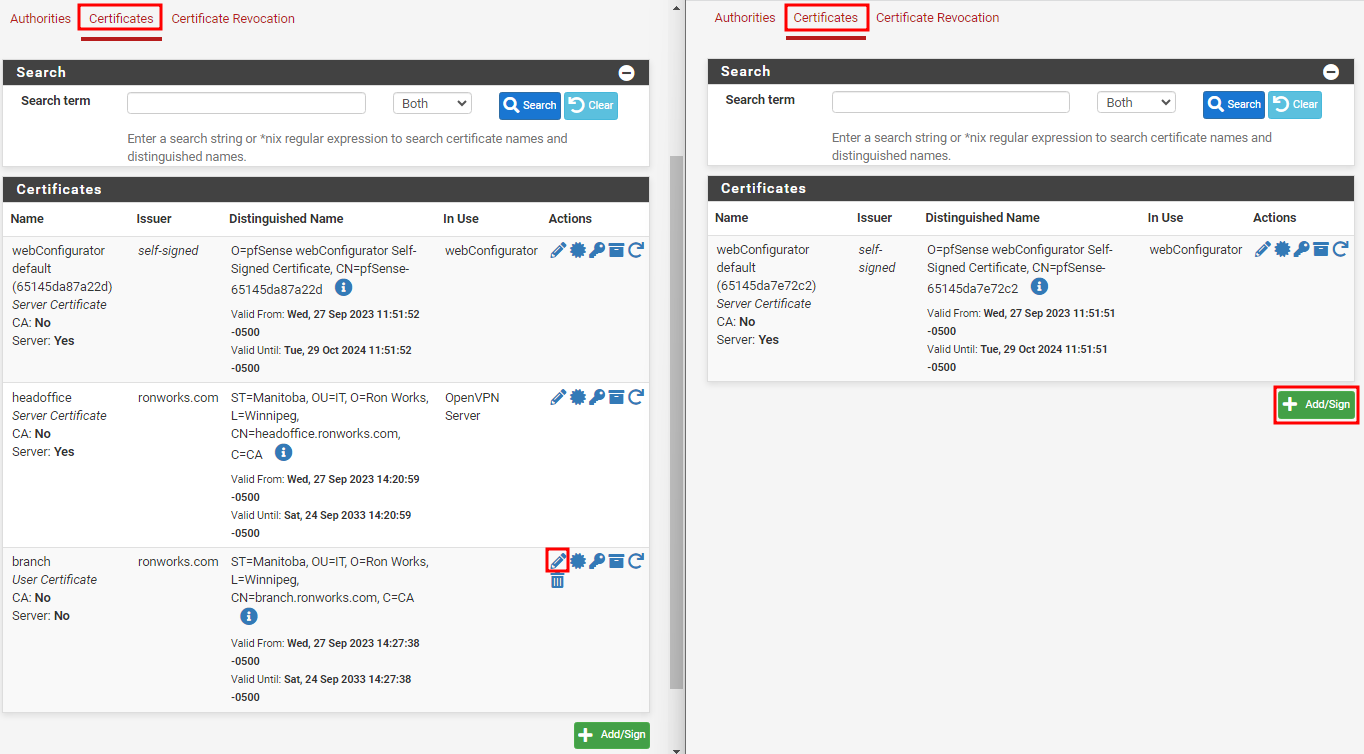
- On the client’s method choose Import an existing Certificate then copy the same values from the server side. Then click Save.
OpenVPN Server
Configuring PFsense as OpenVPN Server
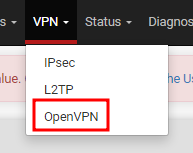
- VPN > OpenVPN
- Click Servers tab then click Add
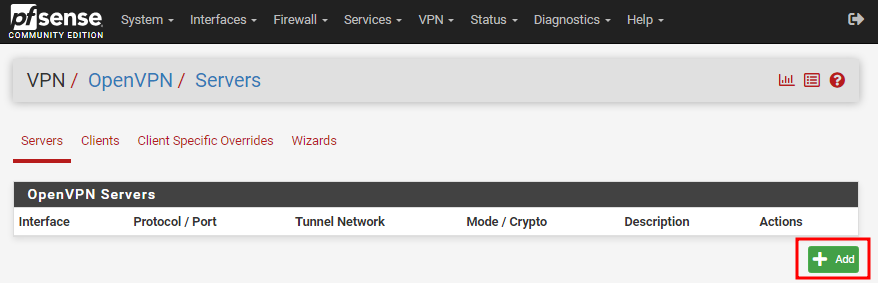
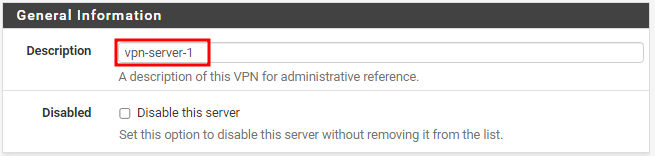
- At the General Information, indicate a description to this vpn server.
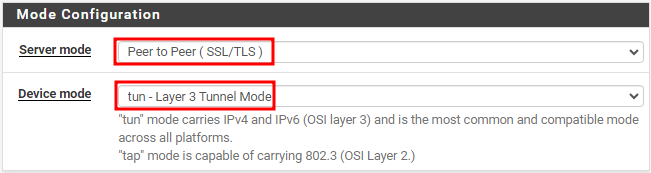
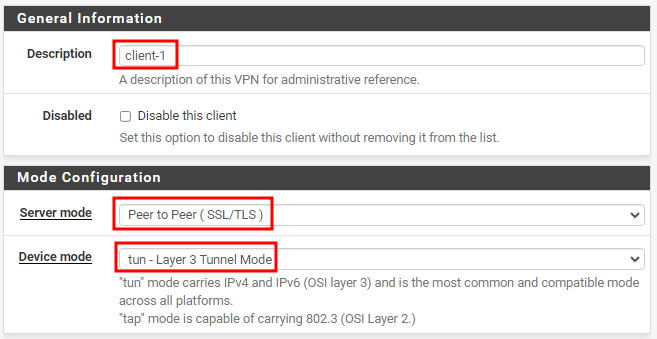
- At Mode of Configuration choose:
- Server mode : Peer to Peer ( SSL/TLS )
- Device Mode : tun - Layer e Tunnel Mode
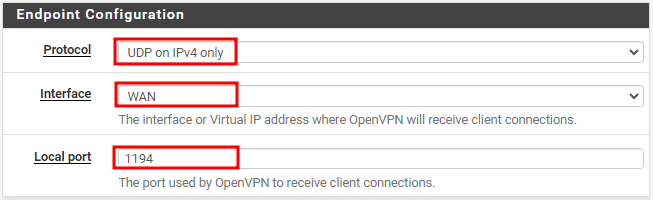
- At Endpoint Configuration, use the following settings:
- Protocol : UDP on IPv4 only
- Interface : WAN
- Local port : 1194
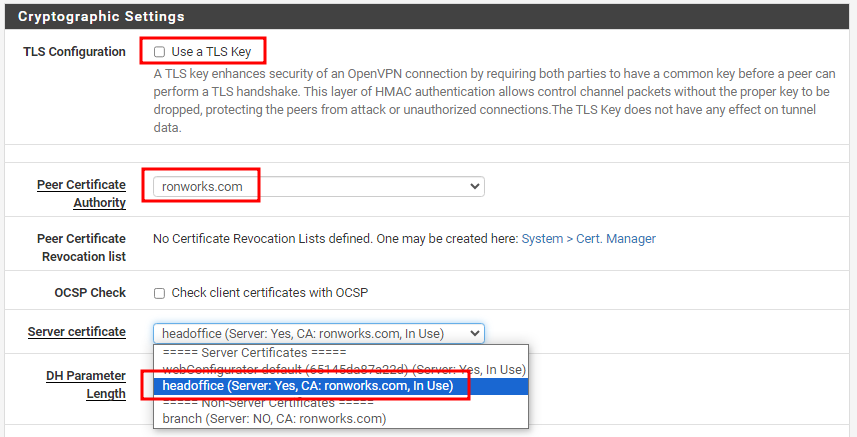
- At the Cryptographic Settings:
- Use a TLS Key : Make sure its unchecked
- Peer Certificate Authority : Make sure its the same CA created in certificates section.
- Server certificate : Choose the server certificate created for this server.
- Enforce key usage : Make sure its checked

- At the Tunnel Settings:
- IPv4 Tunnel :
10.8.0.0/24- Assign a network that will be used by the tunnel. Use a network address not used anywhere in your network. - IPv4 Local network(s) :
192.168.100.0/24- Put in here the local LAN network you want to be accessible through VPN - IPv4 Remote network(s) :
192.168.200.0/24- The target network intended to be routed in this tunnel.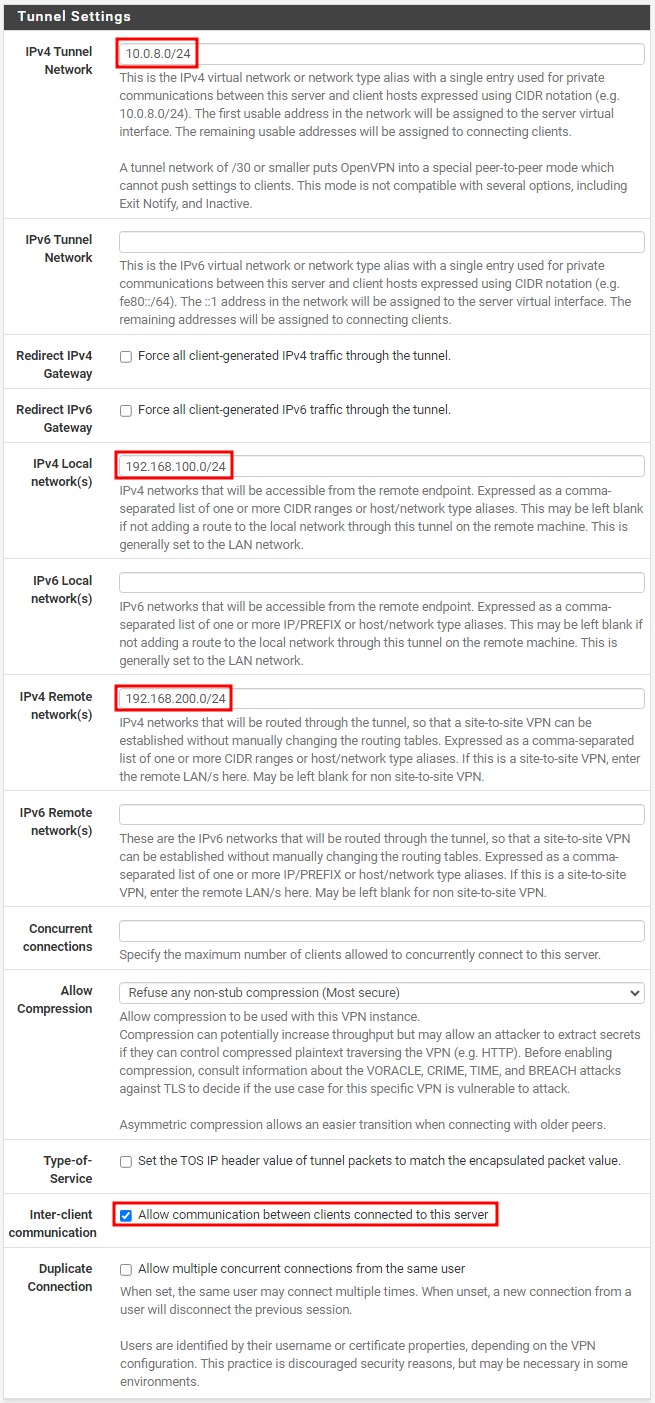
- IPv4 Tunnel :
- Scroll down to Advanced Configuration, at Gateway creation choose
IPv4 onlythen click Save.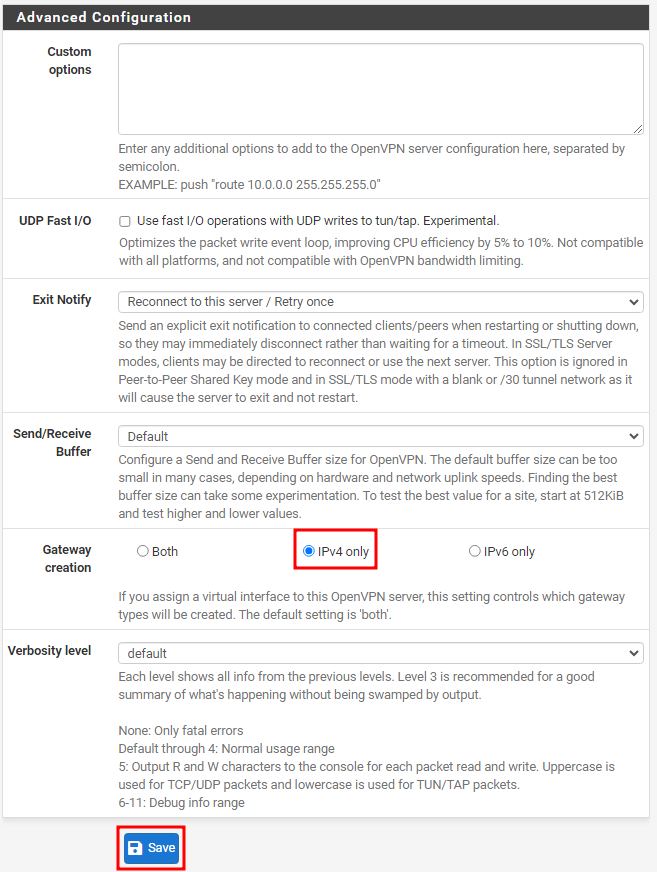
- Go to Client Specific Override tab, then click Add.

- Be guided that :
- Description : Put a name to describe this setting.
- Common name : THis is the CN entry on the user certificate.
- Server List : Choose the VPN server created earlier.
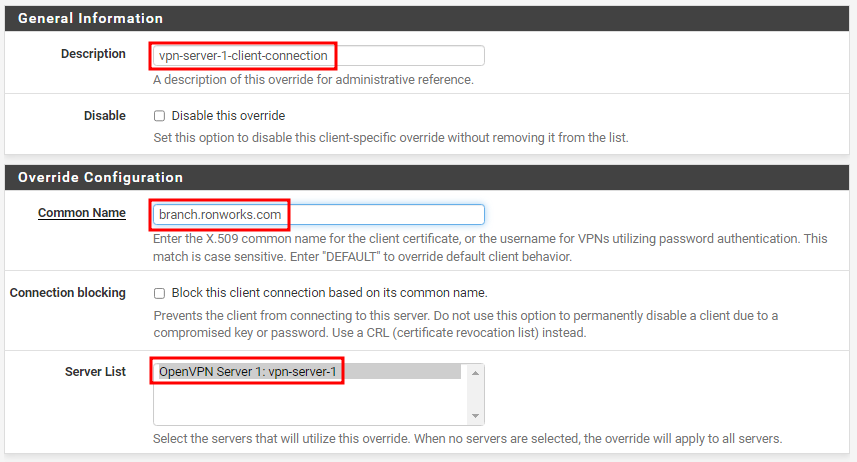
- For IPv4 Remote Network/s, fill this up with the remote LAN’s network address.

- Click Save.
Interface Assignment Configuration
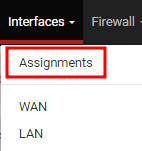
- From the top level menu click Interfaces > Assignments.
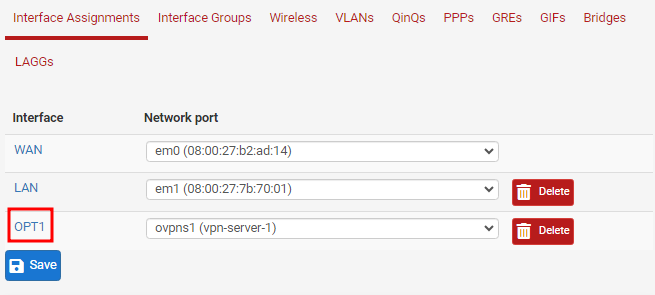
- Verify that there’s an interface named that corresponds to vpn server then click Add.
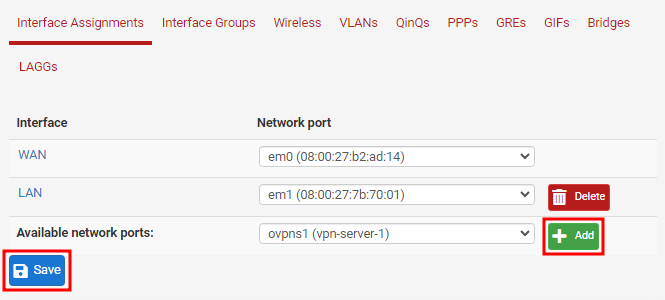
- Once Added, click the name of the added interface.
- Check the Enable interface box. And put appropriate name. Then click Save.
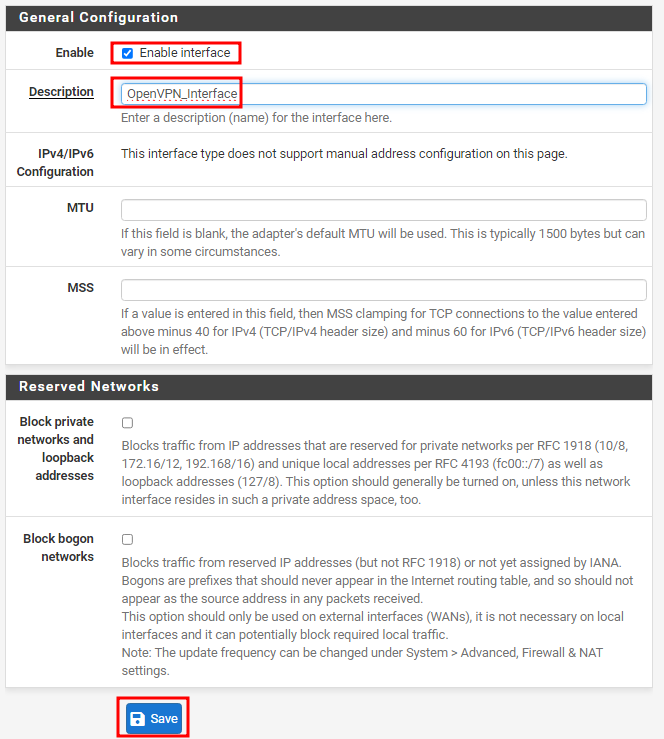
- CLick Apply Changes for the settings to take effect.

Set Firewall Rules
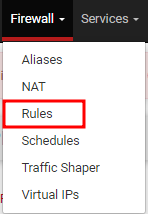
- From the top level menu click Firewall > Rules.
- Go to OpenVPN_interface tab (this is the same just added in the steps above). Then click Add.
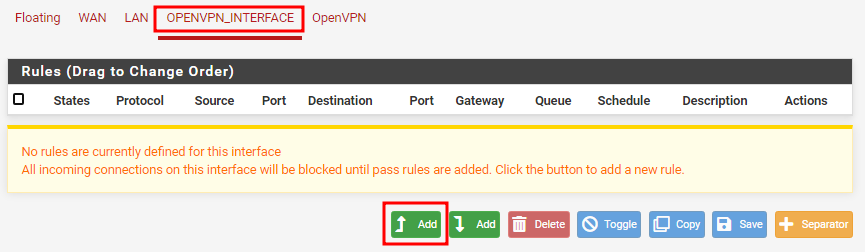
- THen follow these settings:
- Action : Pass
- Interface : OPENVPN_INTERFACE
- Address Family : IPv4+IPv6
- Protocol : Any
- Source : Any
- Destination : Any
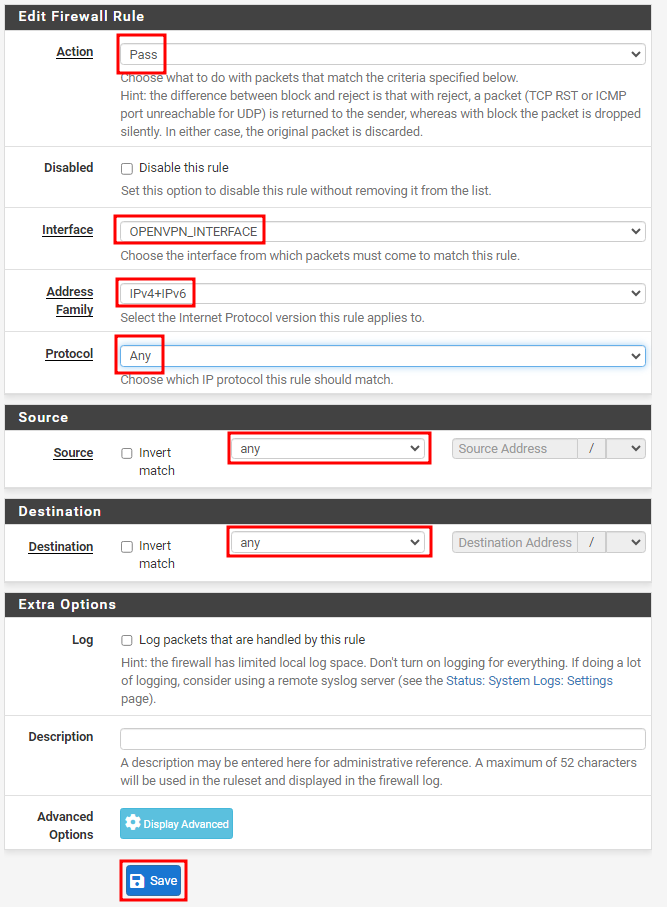
- Click Save.
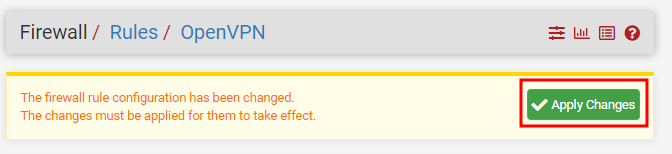
- Click Apply Changes for the changes to take effect.
OpenVPN Client
Configuring PFSense as OpenVPN Client
Do the following on the pfsese on the remote network
- VPN > OpenVPN
- Click Clients tab then click Add

- At the General Information put in a description to idenfy this client.
- For Endpoint Configuration choose the following:
- Protocol :
UDP on IPv4 only - Interface :
WAN - Server host or address :
200.168.100.2- This should be same IP of the server’s WAN address of the VPN server. This IP should be reachable (ping) from the client. - Server port :
1194- Same port used by the VPN server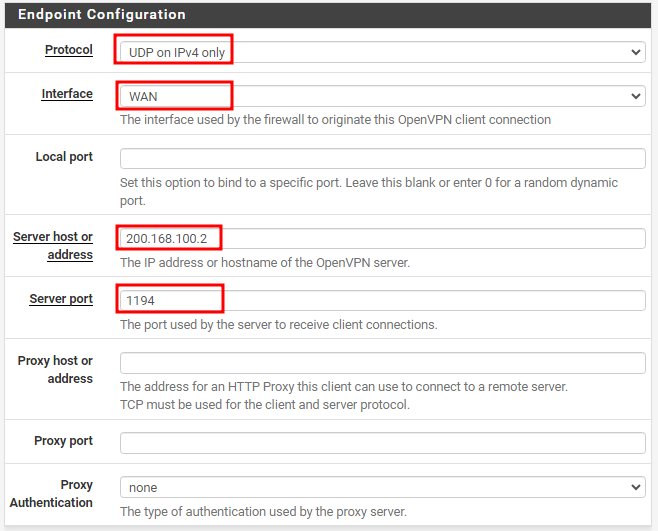
- Protocol :
- At the Cryptographic Settings:
- Use a TLS Key : unchecked
- Peer Certificate Authority : Use the certificated imported CA
- Client certificate : Use the certificated imported user certificate
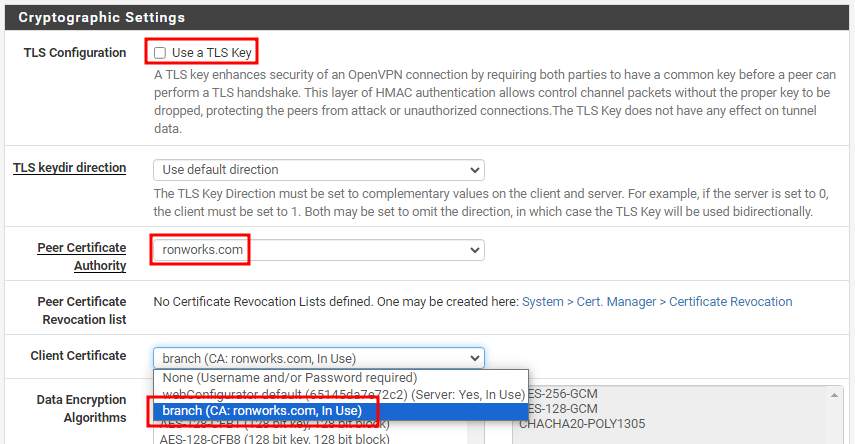
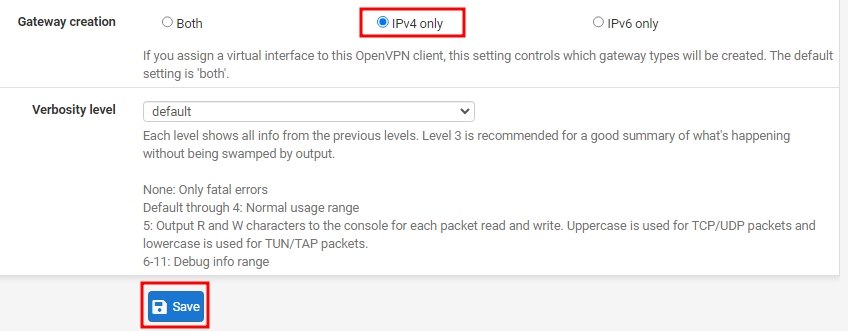
- Scroll down to Gateway creation and choose IPv4 only. Then click Save.
Interface Assignment Configuration
- From the top level menu click Interfaces > Assignments.
- Verify that there’s an interface named that corresponds to vpn server then click Add.
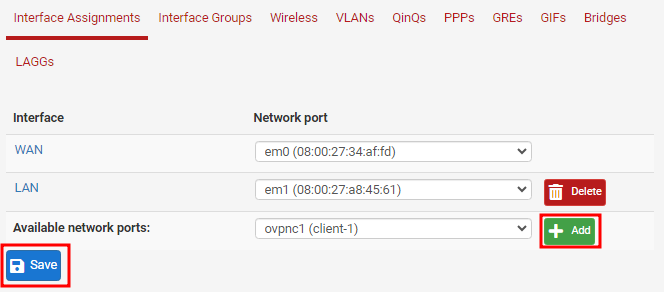
- Once Added, click the name of the added interface.
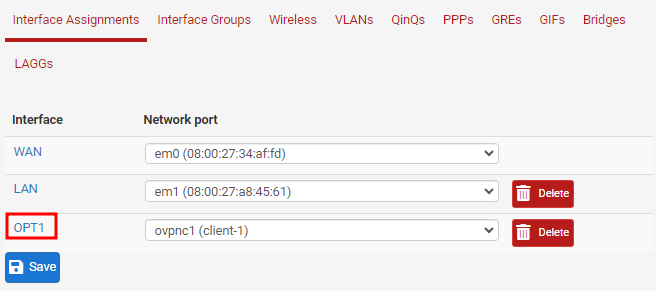
- Check the Enable interface box. And put appropriate name. Then click Save.
- CLick Apply Changes for the settings to take effect.
Set Firewall Rules
- From the top level menu click Firewall > Rules.
- Go to OpenVPN_interface tab (this is the same just added in the steps above). Then click Add.
- Then follow these settings:
- Action : Pass
- Interface : OPENVPN_INTERFACE
- Address Family : IPv4+IPv6
- Protocol : Any
- Source : Any
- Destination : Any
- Click Save.
- Click Apply Changes for the changes to take effect.
Static Routes Configuration
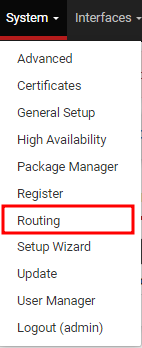
- From the top menu click System > Routing
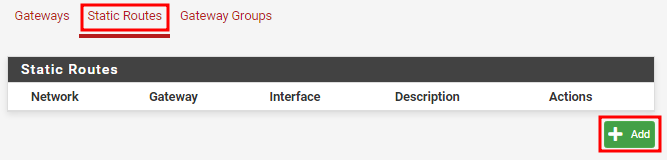
- Click Static Routes tab, then click Add.
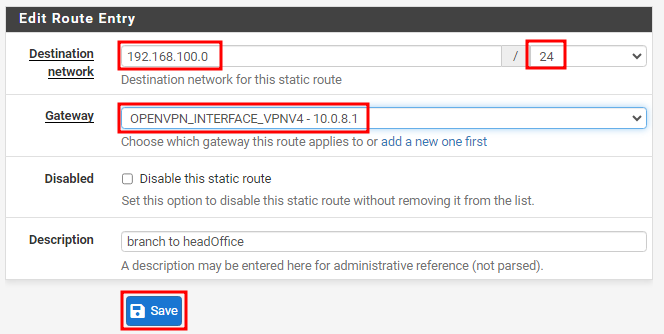
- At the route entry create a route going to the remote network through OpenVPN interface. Then cLick Save.
Summary
This guide detailed the necessary steps to configure a site-to-site OpenVPN connection using PfSense. Key steps included creating certificate authorities, server and user certificates, configuring the OpenVPN server and client settings, and setting up the necessary firewall rules and interface assignments. This guide ensures that users can establish a secure and reliable VPN tunnel between two sites, facilitating secure data exchange.